How to run your ‘business as usual’ while you take a break
Running-your-business-while-taking-a-break

One of the best things about freelancing is that we can decide when it’s time to take a break and for how long. We don’t need to coordinate our holidays with work colleagues, or get supervisor’s approval. We have the freedom to take time off whenever we want.

However, as opposite as many other jobs, taking time off for us also means not making any money during that time. That’s why many freelancers feel they can’t afford to take a long break and go on a holiday.

After three years running Grafika Studio, I finally managed to take my first five-week holiday without causing any financial stress to my business. How I did? With a lot of planning and a little bit of help.

1.    Plan your finances a year in advance

When you work for others, the money you get at the end of each month is all for you and for your own personal expenses. When you work for yourself you must set aside a big part of this money earned every month to pay for many difference things in your business.

Most if this money will be spent in taxes, some more in business expenses, marketing and advertising and other unforeseen expenses such as repairs and replacements, sick days, etc.

When you work for yourself you don’t get paid holidays either, so you must set aside some more money for them. You need to save enough to be able to afford an entire month of inactivity and still be able to pay your bills and your holiday expenses.

HINT: to take one month off with no financial stress, save 9% of your monthly income for 11 months.


2.    Find the right time

Many businesses have low and high seasons, mine it’s one of them. People usually want to get their projects started at the beginning of the natural or financial year, and launch them just before Christmas or the 30th of June.

The beginning of every natural or financial year is always full of new project enquires. The end of them is full of project deadlines. These months are never a good time for me to take time off.

TIP: to know when it will be a good time to take a break, observe the seasonality of your business for at least two or three years before.


3.    Close projects a few ways in advance

As I was planning on being away for the entire August, I stopped taking new projects in June. That way I’d have at least four weeks in July to finish all my existing projects and schedule the new ones for September.

With new projects scheduled from September on I went on holidays knowing that there would be work waiting for me when I was back.

TIP: To ensure every project is finalised before going away, reserve at least the week before leaving for possible delays or last minute issues only.


4.    Let your clients know

A month before leaving I started to tell my clients I was going to go away for five weeks. This put a clear deadline in every project and helped many things keep moving at a faster pace.

After coming back from holidays I contacted my entire client list to let everyone know I had now opened for business again.

TIP: Always set up your out-of-office. Even though you have informed every client of your absence period, they will easily forget and ask ‘when are you coming back?’ a few weeks later. Let your out-of-office agent answer that question for you.


5. Automate your content marketing

Your business may be inactive for a while but your content marketing can be easily automatized and keep bringing new leads and opportunities while you’re away.

You can write and schedule your newsletter, blog posts and social media stories in advance so that they automatically go live while you’re having a cocktail by the pool.

TIP: Most platforms allow you to schedule content for future publishing, but you can also use Hootsuite or Buffer for social media scheduling.


6.    Find a business babysitter

Prospect’s enquiries and quote requests might come while I was away and I didn’t want to miss any opportunity. However, I didn’t want to be constantly reading and answering emails either. So I hired some help.

A virtual assistant answered some email enquires while I was away, booked some meetings for when I were back, quote some jobs and wrote some new posts for the upcoming months.

TIP: if you only have one email address for your business, create a second address for general enquiries. Your website form enquiries and social media notifications can go directly to that inbox and be attended by someone else.


7.    Have an emergency plan

When you tell your clients you’re going to take a long break, the first question that comes to their minds is ‘so, what do I do if I need urgent help?’.

It can be very reassuring for your clients to know you will be available and easy to reach in case of emergency.

That’s why I prepared myself for any emergency by bringing my laptop with me and letting my clients know that if something urgent came up, I’d be available to receive phone calls or chat online and help them virtually.

TIP: If you want to leave the laptop at home upload your documents to a Cloud system so that you can have access to them from anywhere 24/7.


What I learned…

This experience has been a trial for me in preparation to take another longer break soon without impacting too much on my business: 3 months of maternity leave.

Having a good plan in place and counting with a bit of extra help will allow me to remove myself from my business for a while with the reassurance of being able to run many operations as usual even though I’m not around.


BusinessRosa SpencerComment
10 strategies to get your first clients

You have a great business idea, built a fantastic website and start offering your services, but there’s just one problem: you don’t have any clients.

Your first clients are the hardest ones to get, and unfortunately, no fancy marketing strategies will bring clients to your door if you just started business. Why? Because the first step to getting clients is building trust.

The main purpose of getting your first clients is not to make money; it’s to build trust in your business. Use these first clients to:

•    Build a portfolio
•    Add testimonials to your website
•    Get referrals and recurring work

AdWords, Facebook Ads, SEO, and a lot more advance marketing techniques require money, time and a good understanding to be effective. Even if they lead traffic to your website, your visitors won’t convert, because they don’t find any signs of trust. Who has used your services before? What was the outcome?

*crickets chirp*

In today’s post, I’m sharing what worked for my business and my clients’ businesses in this regard, so that you can save time and money trying to figure out how to get your first client.


1.    Email everyone you know

Your first client will most likely come from someone you already know that wants to give you a chance.

When I started my business I emailed all my friends and family members to let them know about my career move and my new business. I asked them for help to find my first clients and mentioned how they could help:

  • By following my business in social media
  • By liking and sharing all my posts
  • By keeping my business cards in their wallets just in case one day they found someone who could use my services.

And that’s exactly how I found my first client: my husband shared my business with everyone he knew too, and his boss’ wife was in need of a new website. (well done John!)

I designed that first website for a third of what I charge today for similar jobs but it was totally worthy, as it has referred me dozens of new projects since then.

HINT: When emailing everyone you know, don’t start with a ‘Hi everyone… blah, blah, blah… I need your help’ and copy everyone in the same email. Send personalised messages, one by one, and take that opportunity to show interests in your friends and families’ lives.


2.    Use your previous work connections

You may quit your job to take a completely different career path, but if your plans are to continue doing the same type of job that you were doing in your previous company, your work connections are gold.

They've already worked with you, so they know you and your work standards. If you were a good teammate in your previous job, you already have their trust.

Don’t just think about your old boss or work colleagues, but also about suppliers, sub-contractors and other people who used to work with you, and can now give you the chance to work with them on a new project.

This one was the sole strategy that my husband used when he quit his corporate job to work for himself and was effective enough for his business to take off.


3.    Introduce your business to your local community

Do you buy from or use the services of a small business in your neighbourhood?  Then bring your cards and some flyers with you and introduce your business to them. Small business owners love helping other small businesses.

Your local gym, your hairdresser, your newspaper agency… any of them could need your services at some point, and even if they don’t, they can still help you promote your business among their clientele.

When I started my business I offered my help to my boy’s childcare centre. Also, I never miss any of their parent’s events, always with a bunch of business cards in my pocket.


4.    Collaborate with a charity

I must admit I didn’t think about this option when I first started my business, but I was lucky enough to be found by Kelete Studio, a dancing school for kids with disabilities. Since I’ve been collaborating with them they promote my business everywhere.

Charities usually don’t have funds to hire a professional, but they can write testimonials, add jobs to your portfolio and spread the word about you, while you help a worthwhile cause.


5.    Offer obligation free consultations

One of the main concerns when hiring a designer is whether you will work well together. That’s why I offer obligation free consultations. Everyone can come and discuss their projects over a coffee, and decide after if we’d make a great team.

Use this consultation to answer your client’s questions and address their concerns. Be helpful, not pitchy or pushy. Give them some information to take with them, and let them make the final decision when they’re ready. This is a great way to build trust.

Small jobs can also let your clients try your services and decide if they like working with you. For that reason, it’s not a bad idea to start offering small design jobs at a low rate, so that people can sample your services and build trust in your business.

Some of my current clients started with just business card designs and other small jobs. Months later they requested an entire rebranding and new website.


6.    Network offline

Industry associations and meet-up groups can put you in touch with people who could potentially need your services at some point.

The main challenge here is to find a group where there are no competitors, only potential clients.

However, if you’re in business, then you’re in the business of building relationships. You never know where you are going to find a new client, so network even when you’re not.

When I take my boy to the park in the afternoon, I bring a brunch of business cards with me. You meet other mums at the park every day, so who knows if maybe one day I meet someone who needs my services there.


7.    Network online

Many business owners only use fan pages to find new clients. Wrong! There is a more effective way to find a client on Facebook: join relevant groups and participle in conversations.

I find many Facebook groups are a great source of information for my own business, but also a great channel to find new opportunities. I’ve also seen young designers offering free help with small jobs, just to add projects to their portfolios.

The trouble with Facebook groups is to find the ones that are actually useful. Some of them can be a waste of time.

On that note, Facebook groups have landed me a couple of clients so far, Instagram none, so:

Facebook 2 – Instagram 0

HINT: when joining Facebook groups; turn on notifications to not miss a thing.


8.    Team up with established agencies

Design agencies sometimes find themselves overcapacity and could need some extra help. If they like working with you, they can turn into repeat work and referrals.

If you are a new designer, working with other established businesses would also give you the opportunity to learn and grow by collaborating with more experienced professionals.


9.    Free speaking

Although I’m still fighting my fears of public speaking, some of my clients have mentioned many times how effective this method is.

If you can find a free space to host a seminar or workshop, don't hesitate to use it. People are usually quite interested in learning anything that can help grow their businesses and networking with other similar business owners.

If you don’t have a physical space, you can take your presentation online and organise a free webinar on a topic of interest for your potential clients.

You can also get in touch with industry organisations, such as the Chambers Of Commerce, as they like to bring speakers to their meetings.


10.    Pitch work in freelance marketplace sites

Although this wouldn’t be a long-term strategy, as jobs are usually low paid here, these sites can be a great way to find work quickly when you are just starting.

Some websites are Upwork, Elance or oDesk. I use Ozlance for Australian clients.

In summary, the only ways to get your first clients is getting out there and talk to people and spread the word because no marketing technique is going to bring clients to your door while you wait comfortably on your couch.


If you liked this post and want to learn to build and run a successful creative business, join my Creative Business School, where you can access all the must-know strategies and tools to explode your business growth in just 6 weeks.


20 things to do before starting a business

Something is changing in the professional world today. Many professionals are quitting their corporate jobs to work for themselves.

Technology has made possible to run a business from anywhere and reach clients everywhere. Parents can now look after their business while they spend time with their kids. Young professionals can travel the world and take their jobs with them.

New business can be started with a minimum investment, few resources and no inventory. Setting-up a business is now easier than ever, but it also requires a lot of planning.

In today's post I'll take you through 20 important things to do before starting a new business. If you're thinking about quitting your 9-5 job and starting your own business this post will help you get ready for the transition.

1 | Choose a business name + entity

Coming up with a great name can be difficult, finding a name that is not taken even harder. To find my own business name I used this Name Brainstorm Worksheet, by Fuze Branding, with 4 simple steps for naming your business.

As soon as you find the name, register your business name and your domain before someone else takes it! If you are based in Australia, you can download my Business Registration Checklist (for Australian businesses).

2 | Find your ideal niche

Trying to sell anything to anyone can result in selling to NO ONE. Finding a niche will give you an opportunity to offer a more refined solution for particular problem or satisfying the needs of a specific group of people, where the competition is lower. In this other post I take you through the process for finding your ideal niche.

3 | Decide on your product or service offering

There are thousands of products and services available to consumers today. To enter the marketplace with a new product or service, you must be able to offer something that's different or better in some way than what's already being offered by your competitors. Don't try to sell anything, only sell your best product or your best skill.

4 | Study your competition

There are other professionals who are probably helping your ideal client to resolve the same kind of problems that you are. Know who your competitors are and how they are already helping your ideal client, and come up with other different and better solutions for the same client.

5 | Find your differentiation

In today's over-saturated world, it’s very difficult to get noticed. The only way to stand out in your market is by finding a differentiation. Find what values and benefits you can deliver that no one else can.

6 | Establish a clear brand direction

Purpose is what differentiate a superficially pretty brand from a meaningful brand with strong personality and clear direction. Define your brand direction by putting together your vision and mission statements, as well as your core values.

7 | Design an effective logo

Your logo is the heart and soul of your brand. It identifies your business in its simplest form. In spite of its simplicity, a logo is always full of meaning. An effective logo design needs to be simple, memorable, timeless, versatile and appropriate. In this other post I share my process for designing a effective logo.

8 | Build a professional visual identity

Your brand can be styled by adding other visual components like typefaces, colour, patterns, etc. These components are assembled within a set of guidelines - a style guide - to determine how to apply them in different mediums. You can download my template to create a professional visual style guide here.

9 | Brand your business

Every piece of communication that your clients see speaks volumes about the way in which you do business. Make a list of documents that you will need put in front of your clients and create branded templates, email signatures and printed business stationary to show how much you care about your business.

10 | Invest in high quality images

Images are the most powerful way to deliver your message and the number one thing that can kill your business image if they are not right. So hiring a professional photographer to get high quality photos of your products, your work and yourself will be the best business investment you can do.

11 | Decide your pricing

Pricing is a sensitive aspect of any business that can significantly impact in people’s perceptions. Before starting your business you need to determine how much your products, time or expertise worth. Make a price list and have a quote template if you sell services. You can download my quote template here.

12 | Choose payment system and set conditions

Invoicing clients and getting paid on time are challenging aspect of any business. Before starting your business, decide your pricing structure, payment methods, return policies - if you will sell products - etc. In this other post I shared some strategies to build steady income as a freelancer.

To invoice clients you can use free invoicing software like Wave and Paypal.

13 | Start a cashflow statement

As soon as you start your business you need to keep a record of the money flowing in and out to know how much much you made after expenses. If you're unsure about how to keep track of your finances, you can get my Finance Planner for small businesses, available at my Etsy shop.

14 | Get your contract ready

If you're selling professional services, a contract is extremely important to ensure a satisfactory professional relationship between you and your client. This document clarifies the terms of service and sets expectations and limitations. You can get a Standard Form of Agreement for Design Services from AIGA.

15 | Establish a communication workflow

A good communication process can set the basis for a successful - or disastrous - project or client relationship. Having a good communication process in place will save you time and headaches and deliver a great client experience. To learn how to streamline your business communications also read this other post.

16 | Launch your website

Your website is the base of your communications and needs to go live before creating any other brand element, as you will want to include the website address in your stationary and other marketing materials. To ensure you get your website right from the beginning read this other post, with things that you should do before getting a new website.

17 | Create social media profiles

Social Media can be powerful and cost-effective tool to promote your business. However, keeping your profile active requires time, dedication and resources. Before taking your business to social media, determine first which platform is best for your business.  You can learn more in this other post on Which Social Media Should I Choose To Promote My Business?

18 | Start a mailing list

Your email list is the most effective way to connect with your audience after visiting your website. Building an email list can take time and a lot of work. Connect your website with an email system, such a Mailchimp, and start collecting email addresses as soon as your new website goes live. Learn more about how to build your email list in this other post.

19 | Promote your business

Let everyone know that you are about to start a new business. Then you can develop a 12-month marketing plan for your business that combines some online and offline actions To help you create a comprehensive marketing plan you can get my Small Business Marketing Planner at my Etsy shop.

20 | Find your first client

You won't officially in business until you don't have your first client. Your first referrals and clients may come from people close to you, so ask your family and friends to help you promote your services or shop. If you can't find any client start doing some charity work to build your portfolio or simply help people with small jobs. Most of us started that way.

If you dream about having your own business but don't feel confident enough, join my Creative Business eCourse. I'll show you all the secrets to build a creative business from scratch and set yourself for a huge success!

My 6 module program has been designed to fast track your creative business and help you achieve an elusive work-life balance.

FIND OUT MORE HERE!


Lessons learnt from my second year in business

My business has been two years on the go this month. How cool is that, right? It’s exciting to see my “baby” growing up year after year, and it’s also great to see my own growth as a professional and sole-entrepreneur.

Constantly learning is one of the best things about running your own business. Quite often, you have no one to teach you how things have to be done; the only way to know is by trying. Sometimes you succeed, sometimes you fail, but there is something you always do, and that’s learn.

Last year I wrote this other post on the lessons I learned after surviving my first year as a freelancer. In today’s post, I’m sharing three more valuable lessons that this second year has taught me.


Lesson 1 | The value of time

I didn’t learn this lesson until my second year in business, probably because my first year wasn’t as busy. But half way through my second year I started a waiting list, with clients requiring to book their projects 3-4 months in advance.

Looking back at my days in the corporate world, time wasn’t so precious. I had to be in the office from 9 to 5. Time wasted on the phone, emails or unnecessary meetings wasn’t a big deal.

Now, as a freelance designer, every minute counts. Time spent on anything that doesn’t generate revenue is costing you money.

Companies have different teams to look after many different areas of the business: IT, accounting, marketing, operations… But freelancers are all in one. We have to look after clients, IT issues, website updates, bookkeeping, etc, and these tasks don’t generate any revenue.

In my typical week, there are usually 3 types of tasks:

  • the ones that generate direct revenue, i.e. client work
  • the ones that hopefully will generate revenue indirectly, i.e. marketing, advertising, networking, etc
  • the ones that don’t generate revenue but are necessary for the business: accounting, invoicing, office maintenance

Reducing the amount of time spent in the third group of tasks – the ones that don’t bring revenue - means that I can dedicate more time to work with clients and build profit.

For me, managing my time effectively means to find the right balance between billable and non-billable work every week. For example, spending 1 hr a week on invoicing can be necessary, but spending 3 hr could be time that my business cannot afford.

An activity book – or time sheet - helps me plan in advance the right amount of time I can afford to spend on each group of tasks along the week and track hours to ensure I stick to the plan. My typical week is split like this:

50% Client work
30% Marketing and blogging
10% Business development and client care
5% Self development
3% Accounting and invoicing
2% Business management and planning

You can download my activity book template below (in Microsoft Excel)

Grafika-studio-activity-book

Time and money spent in marketing and promotional tasks are a gamble. If these activities don’t generate new leads, opportunities or sales, they are also a waste. Here is when conversion rates become critical.

Takeaway: Plan your time ahead each week and make sure you minimise the number of hours spent on non-billable tasks by automatizing processes with the help of templates, software and other online tools.

In this other post, you can find a list of tools that I use in my business to save time and work more efficiently.


Lesson 2 | The importance of having a process

In my first year, I didn’t have a standardised process to work with clients. I used to set-up a process after meeting the client and understanding their specific needs. But that tailored approach had more disadvantages than benefits.

Now I have streamlined my process to work with clients.

For my website design projects, I’ve defined a single work process with 8 stages. Each stage is broken down into small steps to be completed by either the client, a third party or myself. A deadline is also assigned to every step to ensure that the project is completed on time and doesn’t cause delays in other projects.

As described in this other post on How To Streamline Your Process To Impress Your Clients I’ve also set up a communications process for every project to deliver a great client experience.

Having a pre-defined process to work with clients has many advantages:

  • Project management efficiency - After having gone through the same process many times I know it by heart. Every new project is easier to manage, I can complete tasks quicker and minimise errors. Deadlines are also easier to meet.

  • Clarity and trust - My process is easy to explain and simple to understand by clients. They know what to expect from working with me since day 1. They trust my expertise.

  • Accuracy - By knowing the amount of time that I need to complete every task and possible issues that I could find along the way, I can calculate how many hours every project requires and quote accordingly, avoiding nasty surprises in the final invoice.

  • Consistency - Every client receives the same service, the same value for money and the same dedication and attention, creating a consistent experience for anyone who works with me.

Having a streamlined process, plus the help of a project management tool which is Freedcamp, allows me to take 5 or 6 projects on a time (I used to take 1 or 2 in my first year) increasing my monthly revenue and managing projects more efficiently.

Takeaway: a clear and well-defined process can set you apart from your competition in the over-saturated design industry and make your clients fall in love with your work.


Lesson 3 | The freelance income roller coaster

Did I say how much I miss my steady paycheck from my old job? I think I’ve said this a few times already, but I’ll say it again: I miss the days when I used to know how much money I’d have in my bank account at the end of the month. Now, my monthly income is quite unpredictable.  

The freelance work usually comes inconsistently. You can go from being overcapacity to have several months with no new projects or leads. These months can become quite stressful and put a lot of pressure on the family finances.

Bringing revenue as often and consistently as possible is one of the biggest challenges that any small business owner has to face. In this other post, I’m sharing some tips to build a more consistent income when you are a freelancer.

To not only depend on client’s work, I’ve diversified my offer by selling digital products. But here is another common problem of making money online: digital products have a very short life.

Starting a new business has never been easier. Amazon, Etsy, Kickstarter, etc make it possible to start selling online with no inventory, no investment and no overhead costs. Selling online is a great source of passive income for many small businesses.

But everyone knows that. If you’re making a quick profit selling something online, chances are that many others will soon replicate your idea taking a piece of your pie.

Sources of income come and go quickly. Seeing some of my ideas growing up and slowing down as fast as the speed of sound has developed a need to be constantly rethinking my business, measuring results and implementing new ways to make a profit and grow within my niche.

Takeaway: Any self-employed designer goes through times where work slows. Managing finances during the ups and downs is vital for your business to survive.

Are you considering taking the leap into the freelance life? There are so many things I can share with you! Join my 6 weeks creative business ecourse and let me tell you the secrets to becoming a successful sole-entrepreneur.


A Simple Formula To Grow Your Email List Fast

Your email list is the most effective way to connect with your audience after visiting your website. Everyone is busy today, visitors come and leave your website fast, and visits are usually quite short. Because of that, many visitors will forget your business as soon as they leave your website and won't come back again.

It’s said that people need at least seven exposures to brand messages before they make the decision of purchasing from that brand. But if website visitors come and go so quickly, how can you re-connect with them another six times more? The answer is by building an email list.

In last week’s post on The Journey From The First Visit To The First Sale, I talked about how to engage visitors so that they become customers or clients. Part of this engagement process involves collecting visitors’ contact details to stay in touch after they leave your website.

The problem is that today every business wants to build an email list and send communications to their prospects. We are reluctant to give our email details to any other business, as we don’t want to inundate our over-saturated inbox with more email marketing.

There is only one reason why we may give our contact details away, and that’s because we get something valuable in return: a lead magnet.


What’s a lead magnet?

A lead magnet is an incentive given to a prospect in exchange of their contact details. It’s usually exclusive and fabulous content or a sale incentive.

The lead magnet content doesn’t have to be too long or complex, just quick and simple, relevant to your audience and highly actionable. It does need to resolve a common problem or challenge that your prospects may be experiencing.

Here are some lead magnets ideas:

How-To ebook or guide
Report (e.i. income report)
Cheat sheet, checklist or resource list
Template
Stock photos
Fonts, icons and other graphic design elements
Access to member-only areas
Video training, ecourse or webinar
Software download, WordPress plugin or online tool
Free trial or freemium content
Coupon, discount or free shipping
Sale material (price list, floorplans, etc)
Event tickets
Product samples
TIP: Make sure that your freebie looks professionally designed. A great free tool to create a great PDFs and graphics with no design skills is Canva.

To know more about how to create a great lead magnet also read this other post by Steve Scott.


How to build your email list with a lead magnet?

So you have a fantastic piece of content and want to use it to build your email list. Here is what you need:

1.    Lead Magnet
2.    Catchy call to action (CTA)
3.    Landing page (optional)
4.    Opt-in form
5.    Email Marketing system (in this post I’ll be using MailChimp)

And these is how it will works:

Create a button with a call to action: Download FREE***

Learn how to create a great call to action in this other post

    Find the appropriate placement for your CTA

    Top menu bar
    Page header
    Blog sidebar
    At the bottom of post
    Page footer
    Pop-up/popover
Tip: Go above the fold whenever possible to increase the number of visitors that see your CTA. Popup forms could be both very effective for conversion and very annoying for visitors who are not interested.

    Create opt-in form to collect name and email details. You can do this directly from your CMS (WordPress, SquareSpace, etc..) or from MailChimp.

    From SquareSpace - edit your page or post, click on Inset Content block and select Newsletter or Form.
    From MailChimp - go to Lists, select your list, click on Signup Forms › General Forms, and the signup link should be right there. Copy the code and paste it on to your web page or blog post.

    Your opt-in form can have different formats:

    • Embedded form: directly on your page, post, header, footer or sidebar.
    • CTA button: visitors must click on the bottom to display the form.
    • Top-bar announcement: the form is displayed at the top of the page.
    • Pop-up: the form is displayed on top of the page and you must close it to read the page.
    • Slide-up: the form is displayed in a corner of the screen and can collapse or expand.
    Tip: The number of fields on the form causes the most resistance. Compare the amount of information you ask for in your form to the value of the information you are offering.

        Create MailChimp list of subscribers

    Access your MailChimp account and go to List > Create List

        Link your opt-in form with your MailChimp list.

    Go back to SquareSpace and click on Edit Form > Storage > MailChimp > Select your list from dropdown menu. List

        Customise your opt-in form Thank You message.

    In your SquareSpace Form editor click on Advance and edit your post-submit message. Let your subscribers know that you have sent them a confirmation email to their inbox to confirm their subscription.

        Edit Thank You message to include the downloadable file.

       Go back to Mailchimp. Find your list and click on it. Click on Setting > List name and defaults > Send a final welcome email > List Forms from designer.
       Within List Forms from designer go to Create forms > Forms and response emails.
       In the dropdown menu select Confirmation “Thank You” Page. Hover over the default text and click on “Edit”. Add your text with a link to your downloadable.

        Test your opt-in form.

        Promote your freebie outside your website. Here are some ideas:

        Google AdWords
        Facebook ads
        Facebook groups
        Google + communities
        Pinterest Group boards
        Twitter ads
        Instagram ads
        Add CTA + link to your email signature

    FREE CONVERSION FUNNEL GUIDE

    To know more about converting visitors into leads, and leads into repeat buyers or clients, download my FREE conversion funnel guide, with tool checklist and action plan, and lead the journey to your business growth.


    The Journey From The First Visit To The First Sale: Converting Visitors Into Customers

    The single fact of having a website won’t bring customers or clients to your door. Not even if you have a lot of traffic. The process to get a new client is usually slow and requires creating familiarity and some love in people’s hearts.

    While some first-time visitors may be ready to make a purchase straight away, research has shown that the average visitor will have to engage with your brand, at least, seven times before they‘re ready to make the decision to purchase.

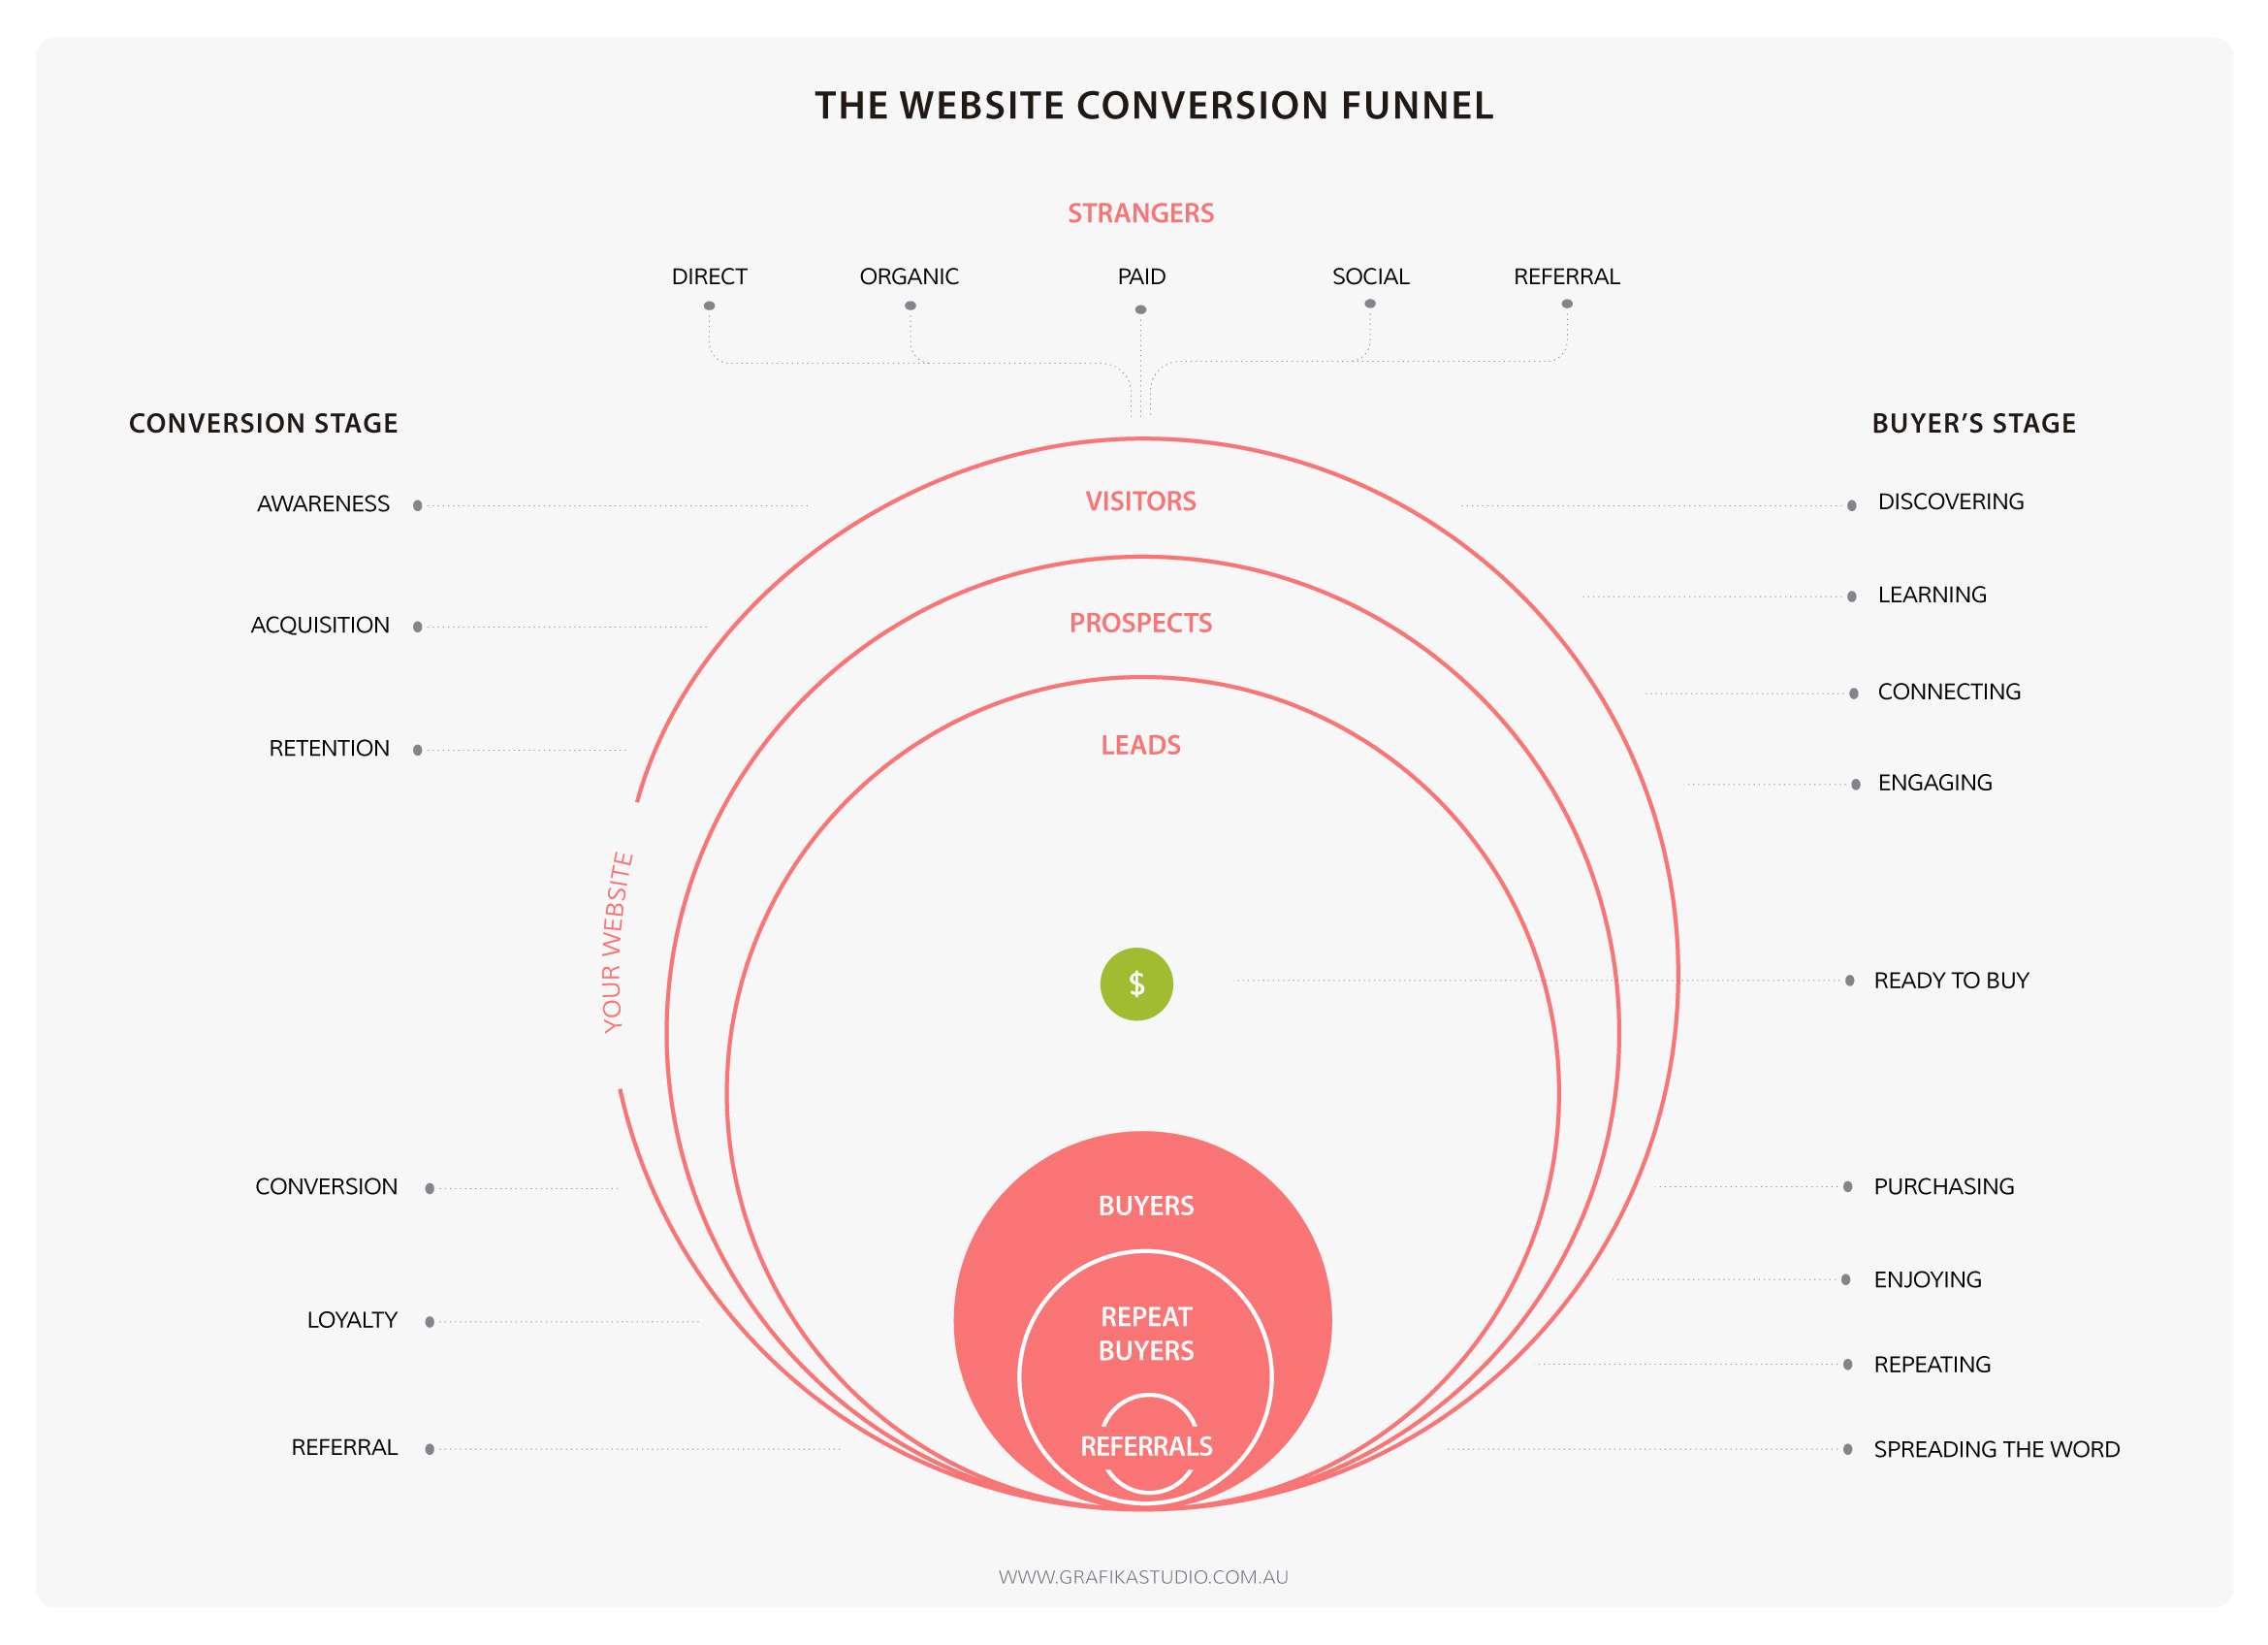
    If you have a website, you need a plan to make your first-time visitors come back again and again and again… until they become buyers or paying clients. The journey taken by visitors until they become buyers is called the conversion funnel.

    Website-conversion-funnel

    The conversion funnel can differ from website to website, depending on the nature of the business, but it usually has four steps - plus two extra ones for repeat businesses or sales:

     Awareness Acquisition Retention Conversion Loyalty Advocacy


    1. Awareness

    Strangers become visitors

    The first step in this journey is getting people to visit your website. No visitors means no chances to introduce your business and offering to others who may be interested in buying from you or working with you in future.

    There are five ways to lead traffic to your website:

    1. Direct - people who find your website in your business stationary, off-line marketing collateral, or any other piece of printed material, and type the website address directly into the browser.
    2. Organic - people who find your website in the organic results (non-paid) of search engines.
    3. Paid - people who find your website in the paid results of search engines and advertising or paid links in third-party websites.
    4. Social - people who find your website through social media forums, chats, hashtags, etc.
    5. Referral - people who find your website in online media outlets, blogs or any other third party website that’s talking about your brand and includes a “non-paid” in-bound link to your website.

    However, traffic is not always equal to sales. Many visitors may be just browsing the Internet, and visiting your website among another 20 competitor’s websites. Chances are that they forget your name as soon as they leave your website.


    2.    Acquisition

    Visitors become prospects

    Every great relationship starts with a first date. Imagine one of your friends knows someone who thinks he or she could be a good match for you. You follow your friend’s advice and decide to go on a blind date. You’ll go to this first date with three goals in mind:

    1. Getting to know each other, your personalities, your interests, your hobbies, etc.
    2. Causing a great first impression and inspire trust.
    3. Getting her/his phone number to stay in touch

    That’s exactly how your first visits work.

    When visitors land in your website for the first time, you must set a good first impression and gain their trust. Good design and compelling content are your main tools here. In this other previous post, I shared some do's and dont's to make your website trustworthy.

    After a positive first impression comes interest. Your visitors will be interested in knowing more about you and what your business has to offer. Your About page, Service or Product pages, portfolio or lookbook and other tools like videos, downloadable brochures, etc, will provide more information on who you are, what you do and how you can make a positive impact on their lives.  

    Finally, if your visitors like your business and are interested in your offer, they may want to stay in touch. Make sure your website has links to your social media pages and opt-in forms to collect their email details.


    3.    Retention

    Prospects become leads

    Your first date is over. It went well and you got your date’s phone number! She or he has even accepted your Facebook friend request. What’s next? You both want to see each other again!

    Once your prospects have left your website you want to make sure they come back again. If they have connected through social media or email, you can now send them links to interesting content on your website that keep them hooked.

    Now content marketing is key.

    There are many ways to deliver your content: blog posts, newsletters, podcasts, webinars, etc. In this other post, I give you 8 ideas to produce highly engaging content.

    Good content engages people and opens a communication channel with them, who may leave a comment on your blog, like or share a post in social media, attend a free webinar, etc.

    The spark is there!

    The problem with getting people’s email addresses though is that everyone has way too much in their inbox. It usually takes a bit more than a simple “Sign-up today” call to action to convince someone to give you an email address. You’ll have to give them a good reason for it, like accessing exclusive content, free downloads, etc.

    To find out more about how to convert prospects into leads also read this other post, by Trent Dyrsmid, Founder at Groove Digital Marketing.


    4.    Conversion

    Leads become customers

    Your visitor loves your brand and is now in need of your products or services, therefore, he or she is ready to hire you or purchase from you.

    In e-commerce websites, the end of the journey is typically the purchase. In service websites, it may be to request a quote or proposal, book an obligation free consultation, make a booking or appointment, or enquire about your services by email or phone. That means that there is, at least, one more step to complete the conversion process.


    5.    Loyalty

    First-time buyers become repeat buyers

    Someone has bought your product or hired your services, now is your opportunity to impress your clients with an outstanding service. Why? Because every satisfied customer or client will:

    • Hire you or buy from you again in future.
    • Recommend you to others

    It’s also a lot easier to sell a new product or service to an existing client than taking any new visitor through the entire conversion funnel until he/she becomes a buyer.


    6.    Advocacy

    Customers become referrers

    Many people won’t search in search engines, read review sites or blog posts if they already have a friend or family member who has made a recommendation to them. These “recommended” visitors are probably ready to hire your services or purchase your products on their first visit to your website.

    The conversion funnel is not needed here. They become customers immediately because they trust someone’s advice, who is already one of your existing clients.


    Your turn

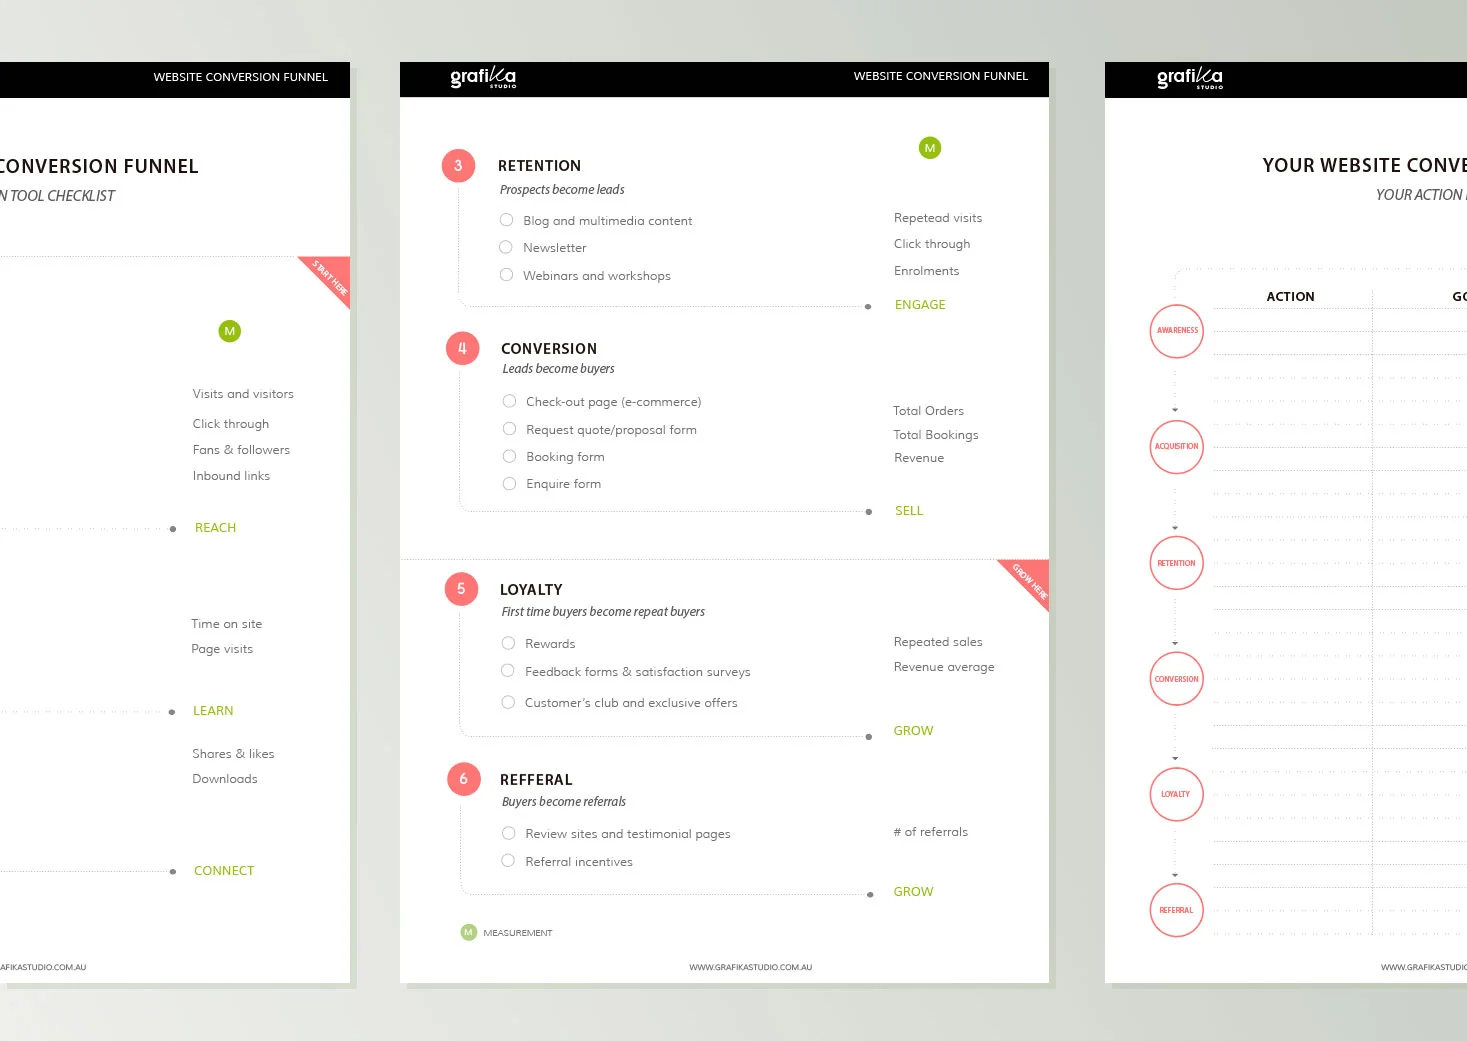
    Now you know the journey from your first visit to your first sale, you can implement this strategy directly into your website. Download my conversion funnel guide, with tool checklist and action plan, and lead the journey to your business growth.

    Website-conversion-funnel-guide

    3 Simple Strategies To Build Steady Income As A Freelancer
    Freelance-steady-income

    There is only one thing I miss from my old corporate job: my monthly paycheck. I miss those days when I used to know exactly how much I was going to get paid every month and when. Now, that monthly income is always a big question mark.

    The first challenge any freelancer has to face is getting enough clients to make a living.  But, even when I managed to have regular clients and projects, I still never knew when the money would finally hit my bank account.

    This situation drove me crazy for months. I used to have 2 or 3 big projects being paid in the same month and then 2 or 3 months with no more payments. The issue ended up causing a lot of stress and constant concerns about my business profitability.

    After analysing the problem with my finance expert husband, we developed three simple strategies that totally changed my business, bringing a more consistent income to my bank account on a monthly basis.

    Grafika Studio monthly income comparison: 2014 vs 2015 income. Just three simple strategies allowed my business to make a lot more income and in a more steady way.

    Grafika Studio monthly income comparison: 2014 vs 2015 income. Just three simple strategies allowed my business to make a lot more income and in a more steady way.

    Although there is not such a thing as steady income when you are a freelancer, here are three ways to ensure money comes to your bank account regularly:


    1.    Milestone payment schedules

    Getting paid for a design project should be an easy task: the client hires you, pays the deposit invoice and a few weeks later you deliver the project and send the final invoice. What could possibly go wrong in this simple process?

    Client’s revisions, holiday periods, indecisions, changes, technical issues, more changes… anything can delay the project completion.

    Design projects often take a long time to complete, even the small ones. Many things can put your project on hold for weeks, which means you won't get paid at all, even though you have already done most of the work and the project is almost finished.

    For this reason, I saw the need of changing my payment structure from two simple payments (deposit and final invoice) to the following:

    • Projects on an hourly rate (usually under $1,000) – total hours are billed at the end of each month, even though the project has not been finalised yet.
    • Projects on a fixed price (usually over $1,000) – a percentage is billed at the end of each phase (design, development, launch, etc) The larger the project is the more phases it will have.

    It takes me an extra hour every month to track all my billable hours through my activity book and invoice everyone, but this way I ensure I get paid for the time I worked along the month more consistently.

    From a client perspective, they usually prefer to get smaller bills every month as their projects develop, rather than a bigger final bill at the end of the project, so everyone wins.

    Also read this other post to find out more about how I price design services.


    2.    Project Size Mix

    You’ve probably heard before that it’s better to make $10,000 from just one client– or a project - than from 10, which means you should always target big clients or projects. In my opinion, this is not always true.

    From a client management point of view it’s easier to manage only one big account than 10 small accounts, but from a business strategy point of view, this is a risky tactic, as your business depends on one client only.

    If your project gets delayed, postponed, or you just simply lose your client, you lose 100% of your sources of revenue. But, if you have 10 small clients and lose one, you only lose the 10% of your business revenue.

    Solution: work on a combination of big and small projects at a time. Big projects take longer to complete but generate bigger revenue. However, if a big project payment fails at the end of the month, you can still have smaller projects to bring quick cash flow.

    At the beginning of each month, I set my priority projects and plan my work around them. I put in my pipeline a combination of 1 or 2 big projects and 4 or 5 small projects. This way I don’t take the risk of working just on one big project that could be potentially delayed, put on hold or even cancelled, and I don’t multitask working on too many small projects that will only generate a small revenue at the end of the month.

    To manage multiple projects, track time and invoice clients you can use:


    3.    Diversify your income stream

    I said it before and I’ll say it again: passive income saved my business in my first year as a freelance designer.

    Building a portfolio of clients who request design jobs on a regular basis and refer you to others takes time. Until you get to that point, there are other things that you can sell online:

    1. Your services (what you are already selling to your clients)
    2. Your products (digital or physical)
    3. Your knowledge (i.e. e-book, e-course, webinars, etc)
    4. Your audience (i.e. advertising)

    Many designers only focus on selling customised services to their clients. But you can also develop your own designs and sell them online. In my first year in business, I created a shop in Etsy to sell digital planners which last year generated over 18% of my total revenue. In my second year, I opened another shop in Society6 to sell artwork.

    Selling knowledge is also another great source of passive income. Your knowledge can be sold in many different formats: ebooks, e-courses, business coaching, etc. Since I started my business paid guest posts and media contributions have generated around an 19% of my monthly revenue. This year I’ve added the e-courses for creative entrepreneurs.

    If you have a blog you can also sell advertising or sponsored posts, by allowing others to place links and other information on your website. I don’t allow advertising or paid content in this blog, but my other lifestyle blog, www.chic-deco.com, generates around 11% of my monthly income in advertising.

    Generally speaking, I wouldn’t be able to make enough through my passive income by itself but this source of revenue brings around a 48% of effortless and consistent monthly income.

    Grafika Studio income streams in 2015. The addition of the shop, a regular collaboration with an industry magazine and advertising from my second blog ChicDeco achieve a more steady income

    Grafika Studio income streams in 2015. The addition of the shop, a regular collaboration with an industry magazine and advertising from my second blog ChicDeco achieve a more steady income


    Take away

    Freelancing brings exciting opportunities to double or triple your income in a short period of time. But at the same time, you need to keep an eye on your finances and ensure you bring money into your bank account on a regular basis.


    How to streamline your process to impress your clients
    clients-communications-workflow.jpg

    Behind any design project, there are a few essential steps that set the basis for a successful - or disastrous - project or client relationship. Many of these steps are project documentation and administrative tasks, which are usually overlooked when you start working with your first clients. However, they can significantly impact on your work, your professional image and your business continuity and success.

    Many freelancers and small business owners learn these lessons the hard way, and I include myself here.

    Nobody taught me how I had to manage an entire client relationship when I first started this business. So I had to make a few mistakes along the way to learn how to do it properly.

    Almost three years after starting my business I now have a clear communication process in place which saves me time and headaches along the project development and leverages my client’s experience.

    Today I’m taking you through my entire client communication workflow to show you how to streamline your business to deliver a great client experience. This process can be useful to any service-based business.

    So let’s start from the beginning…

    With every new project I always have 3 objectives to accomplish:

    1. Creating an outstanding product to impress my client as well as other potential clients.
    2. Making the project as enjoyable as possible for both, the client and myself.
    3. Getting more business from the client in future, as well as new referrals.

    With these 3 goals in mind, I have crafted a comprehensive communication process that starts with the client’s first email and ends with a very happy client and even happier designer!


    1.    The first email

    Getting an email from someone who is interested in working with you is very exciting. This email can be the beginning of a new amazing project. But the reality is that not everyone who contacts you becomes a client.

    Many people are just shopping around. They have an idea in mind, and want to get a better understanding of possible costs and timeframes, but are not ready to get their project started just yet. In some cases, that idea will never go ahead.

    Although getting a lot of expressions of interest is great, you want to minimise the time spent in answering emails and questions from people who ultimately won’t become a client.

    The answers to those questions frequently asked in these first emails should be on your website. This way a potential client can find all the relevant information in your site before contacting you, and you can minimise the time spent answering those questions by email.

    If you get a lot of emails that don’t convert into projects, make sure you have two important pieces of information on your website:

    • FAQs page (see mine here)
    • Pricing page (see mine here)

    Yes, I know every client is different and the total cost of a project can vary a lot from one client to another. And I’m aware of how much information you need to collect first to properly quote a design. But you can give your potential client an idea of the project cost simply by packaging your services.

    Put together the most common things that a standard project involves. Make 2 or 3 examples of standard projects, a.k.a. packages. Set a fixed price for each package and publish your packages and prices on your website. You will significantly reduce the amount of time spent replying emails.


    2.    Welcome pack

    When you get the first email from a potential client there are 2 important things that you can do next:

    • Collect more information about the project, to make sure you understand every possible requirement that can impact in the project cost. To do that, send the client a design brief questionnaire.
    • Offer more information about your process, your fee structure and payment conditions, etc. To do this, I have created a PDF brochure with all the relevant information for potential clients.

    Take this opportunity to schedule an obligation free consultation with your potential client, face-to-face or via Skype, if the client is not local.


    3.    First consultation

    Every long-lasting relationship starts with a first date to decide whether you and the other person are a good fit.

    Sometimes the project may be too big or too complex for you. Others may require someone with very specific technical skills that you don’t have. So this first meeting is key to understand what the project involves and whether you will be able to help your client.

    If you aren’t the right person for the job, you can still offer assistance to source the right professional/s and liaise with them to facilitate the process for your client.

    During this first consultation your client and yourself can:

    • Discuss the project brief and fill in the blanks to ensure you understand all the requirements.
    • Clarify what information the client needs to provide beforehand.
    • Explain what’s included and what’s not in your service to manage client’s expectations.

    After the meeting you can send a quick email to thank them for his or her time and outline next steps to get the ball rolling.


    4.    Secure the project

    After your initial consultation, the client has agreed to start the project. But a design project can take weeks, sometimes months, to complete and a lot of things can happen along the way, including your client changing his or her mind about working with you.

    For that reason NEVER start a project without formally securing the deal through a design contract and a non-refundable booking deposit.

    Signing a design contract

    This document ensures a fair business relationship for both parties. Some of the benefits of having a design contract in place are:

    • You will look more professional and have your clients taking you more seriously
    • You ensure the client reads and understands the terms and limitations of your service
    • It protects you in the case of project cancellation, payment issues, and copyright and intellectual property issues.

    Paying a booking deposit

    This upfront payment is the best way to ensure that you get paid even if the client changes his or her mind about the project, finds someone else to work with or simply gets stuck on their own projects and forgets about yours.


    5.    Manage your project communications

    During the design and development phase there are two essential documents that will ensure you and your client are always on the same page:

    The Design Proposal

    The most common questions that a client always has about their project are: “How much is it going to cost?” “What will I get for that price?” and “How long will it take?“. The best way to give a concise answer those questions is through a design proposal.

    This document also helps you double-check and triple-check the project goals and specs with your client before getting hands with the design.

    A design proposal contains a lot of information about the project and has to be customised for every client, so you would typically have a proposal template that can speed up the writing process.


    Project Plan

    The best way to work collaborative with your clients and other virtual teams on the same project is by using a live project management tool.

    I personally love Freedcamp to manage multiple projects at the same time and work virtually with my clients and collaborators. The benefits of using a project management tool are:

    • You can get the project documentation organised in the same place
    • You will be less dependant on email by taking project conversations and discussions in this system
    • The client can follow-up the progress of their project reducing the number of “how is my project going?” emails.


    6.    Thank You Pack

    The Thank You pack marks the closure of the project. It’s a sweet way to clearly estate the project is over and every extra task that needs to be done from now on will be billed separately. But it’s also your last chance to make your client fall in love with you.

    Don’t just say good-bye, take this opportunity to strength to your existing relationship with your client and leave the door open to work together in future projects, as well as get new referred work from them.

    Some things you can include in your thank you pack - or good-bye pack - are:

    1. Thank you note and a gift – make the client feel special by thanking them for their business and giving them a small gift.
    2. Email subscription - stay in touch by adding their emails to your newsletter list.
    3. Free premium content - Give them free access to paid content and private Facebook groups.
    4. Referral discounts - Reward them for any new referral with discounts in future designer jobs.

    Take action

    Download my Client Communication Checklist to streamline your workflow and deliver a great client experience.

    If you want to see some real examples of these documents mentioned above, learn how to write effective proposals or working with project plans, and download templates to create your own client communication workflow join my 6 weeks Creative Business e-course! You will find all of this information there and much more! Coming soon in March.

    If this sounds interesting, sign up with your email address to receive updates and sneak peeks of this course.


    How To Design A Storytelling Website

    Throughout history, stories have been the most natural way to pass information among humans. Through storytelling, we share knowledge, express emotions and entertain others.

    Stories have always been a primal form of communication…They connect us to a larger self and universal truths.
    — Pamela B. Rutledge, The Psychological Power of Storytelling

    While conventional website design commonly uses card-style layouts to organise the information in small units, narrative layouts can also be applied to websites.

    In today's post I'll show you how you to create a storytelling website and some common techniques to make it engaging and interactive.


    Why a storytelling website?

    An effective storytelling website requires a lot of planning and excellent user interface design. But when it’s done right, it can establish a strong emotional connection between the brand and the visitor.

    Every website has a story to tell, but not every website needs a storytelling layout. Sometimes a single image is enough to tell your story. Words, colours and other graphic elements also tell stories.

    But when the website needs to deliver more complex messages, designers use a combination of two powerful communication tools:

    • Visuals
    • Storytelling layouts

    In web design, storytelling needs to be visual. Visitors find text intimidating; they don’t like to read on the computer screen, so the story needs to be short and told in just a few words.


    What makes a good story?

    First of all, your story must have a purpose that changes visitors' views or believes, or influence somehow their decisions.

    Your story also must engage your audience and encourage them to take some action at the end of it. To achieve this:

    • Make them participate in the story. You can achieve this through some of the interactive techniques described below.
    • Lead the visitor to a conclusion or a “moral” that makes them take some action. You can achieve this through call-to-actions.

    As Jessica Moon says in her post30 Compelling Examples Of Visual Storytelling On The Web “Much like how we expect to see a moral at the end of a book, we expect to find a purpose at the end of a site with a storytelling experience”.


    Creating a storytelling website

    Every story has three parts or acts: setup, conflict and resolution. You can start by dividing your story into these three acts.

    1. Identify a hero and a villain.
    2. Create a setting where the action will take place
    3. Develop an action that contains a conflict
    4. Create surprise factor, with perfectly-timed surprises that visually engage and delight the user
    5. Add a moral or conclusion, and allow readers to think for themselves
    6. Keep the story short and sweet
    Fracking-storytelling-website

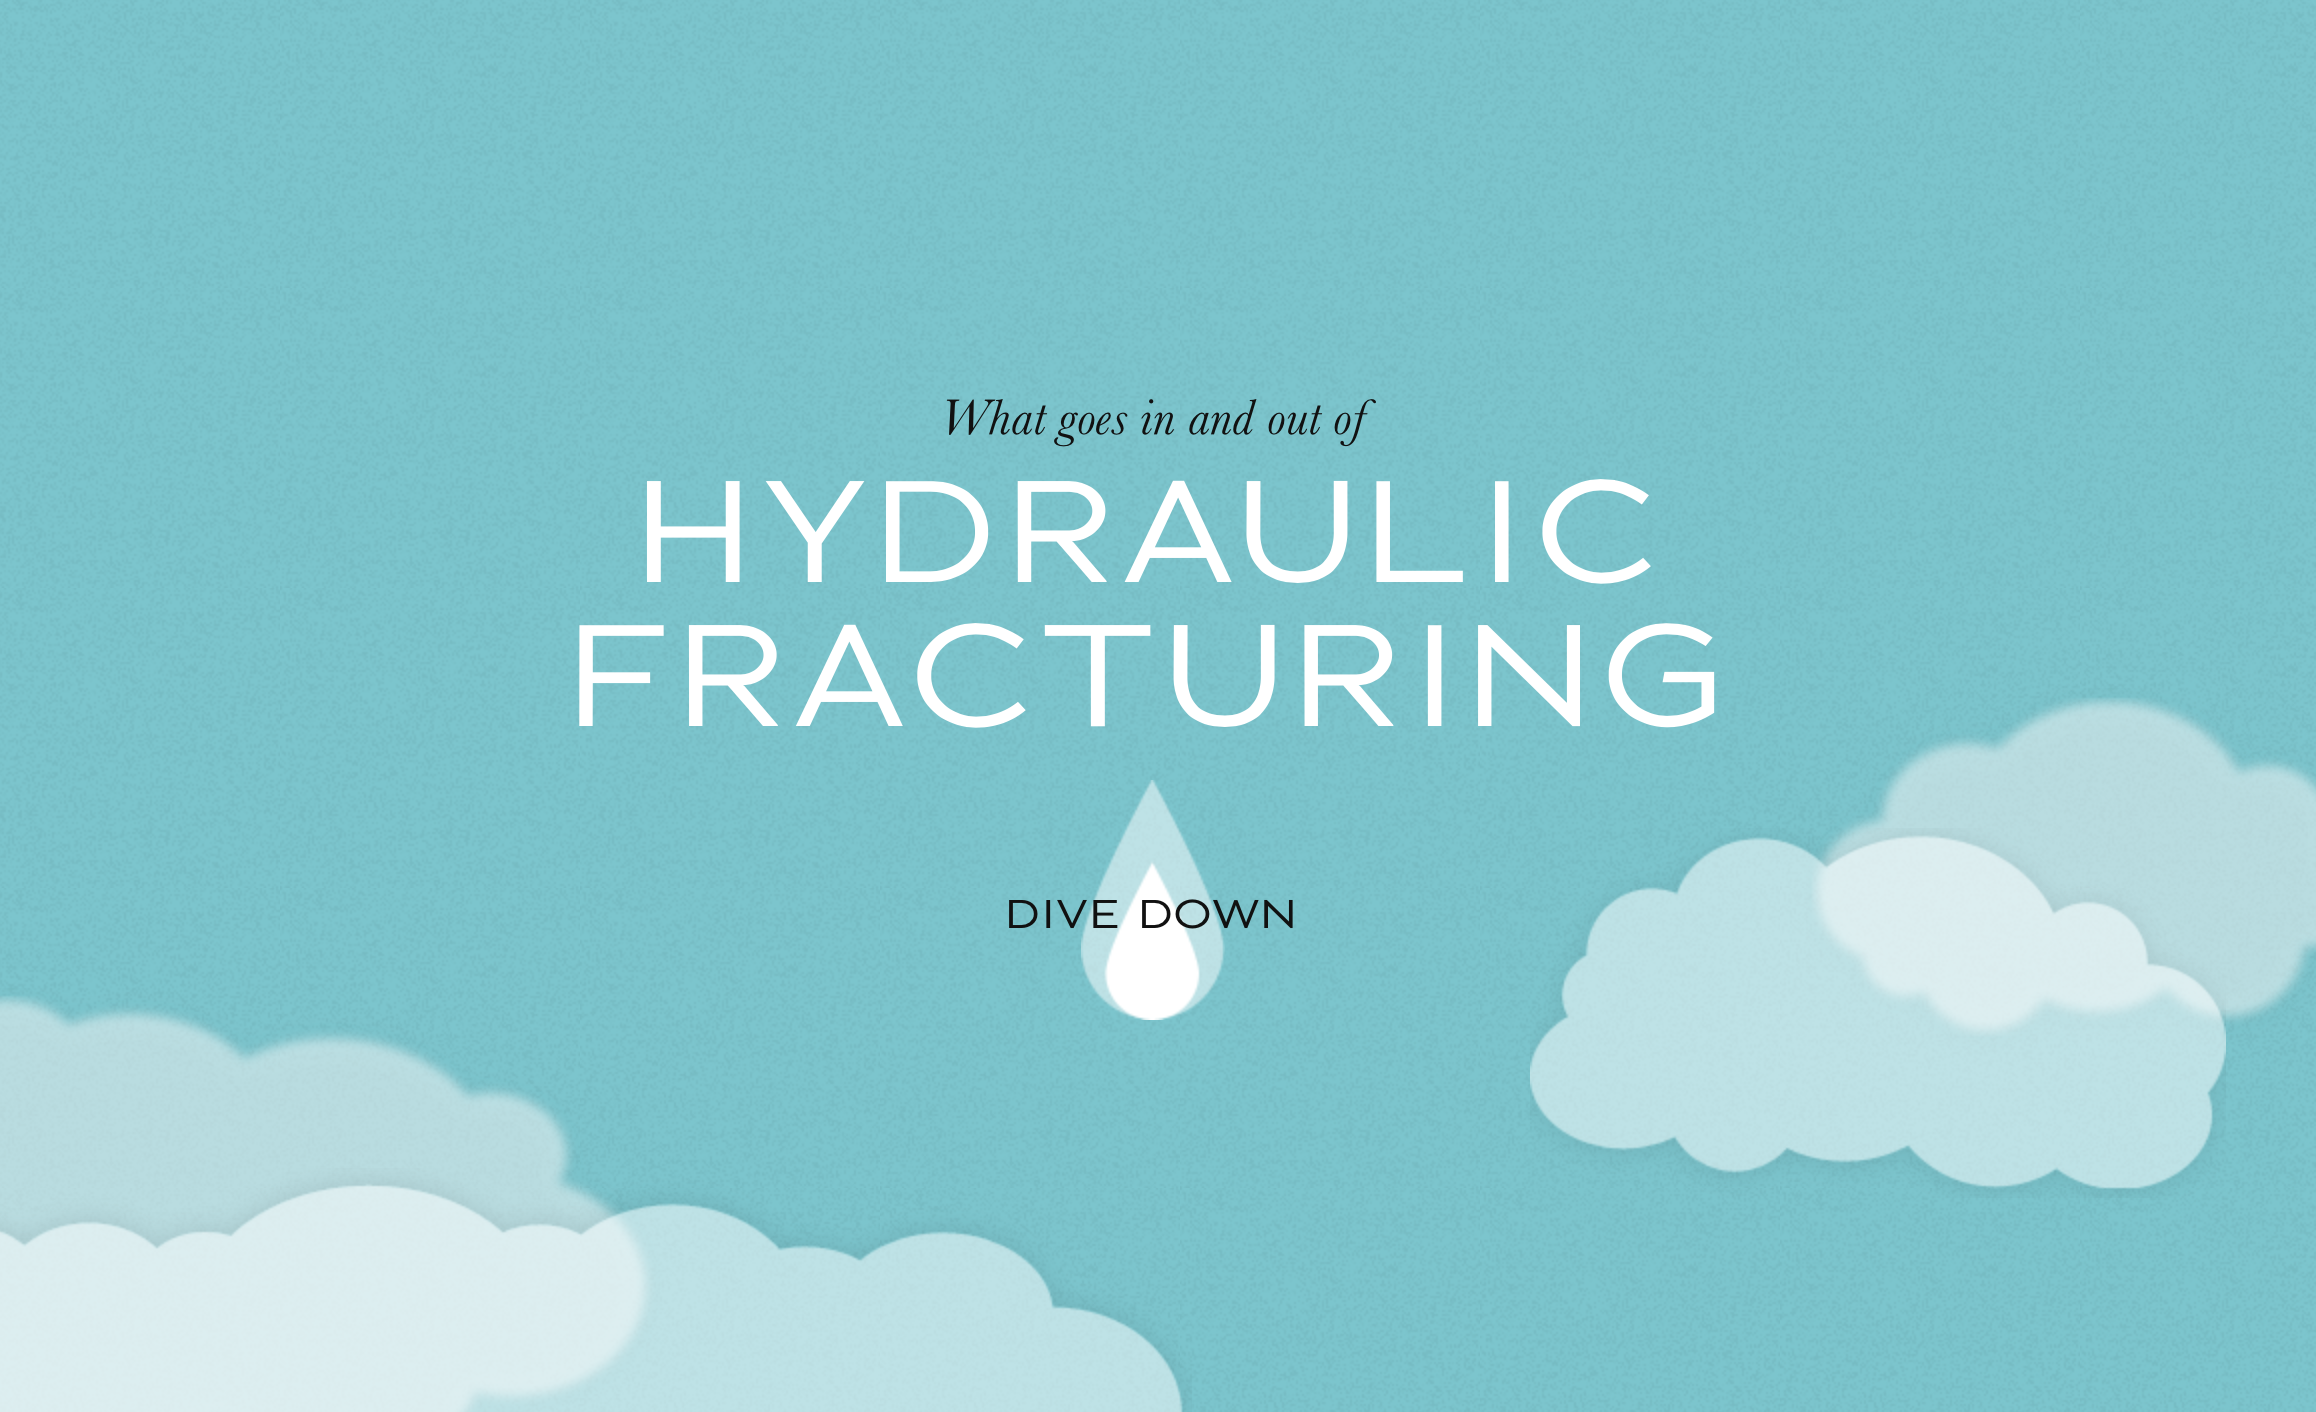
    A great example of story telling website is The Dangers Of Fracking. The website propose of the website is explain the concept of hydraulic fracturing.

    • Hero: the visitor
    • Villain: the hydraulic fracturing
    • Setting: sky city road → fracking site → pipes → sky
    • Conflict: several environmental, safety, and health hazards
    • Surprise factor: scroll-triggered effects
    • Moral: support the FRAC Act
    • CTA: sign up the petition


    Website storytelling techniques

    1. Long-scrolling website

    While long-scrolling websites were something to avoid in web design a few years ago, today, they are the most common layout to tell a linear visual story. They usually combine a long background image with position fixed elements to create a sense of movement when scrolling.

    A long-scrolling site can combine a variety of interactive techniques to engage, surprise and make the visitor participate in the story.

    Apart from the example above, the hydraulic fracturing website, below are other two great examples of long-scrolling storytelling websites:

    Example 1 | Vertical scrolling: Babel The King

    Babel, the story main character, falls down from a cloud to the grass as you scroll down. I love the cute illustrations of this website, designed by its own author karim Maaloul, a Belgiam creative director and founder of interactive agency EPIC.

    Babel-the-king-storytelling-website

    Example 2 | Horizontal Scrolling: The Bright Future Of Car Sharing

    A drive in a virtual car shows the social, economical and environmental benefits of sharing a car ride. The website has been designed as a big interactive infographic, with lot of information and data presented in a visual way.

    The-bright-of-car-sharing-storytelling-website


    2.     Scroll-triggered animations

    The information makes its entrance from the sides or the bottom of the screen when scrolling down, throw subtle animations. This technique gives front-end developers the ability to create richer and more interactive web experiences.

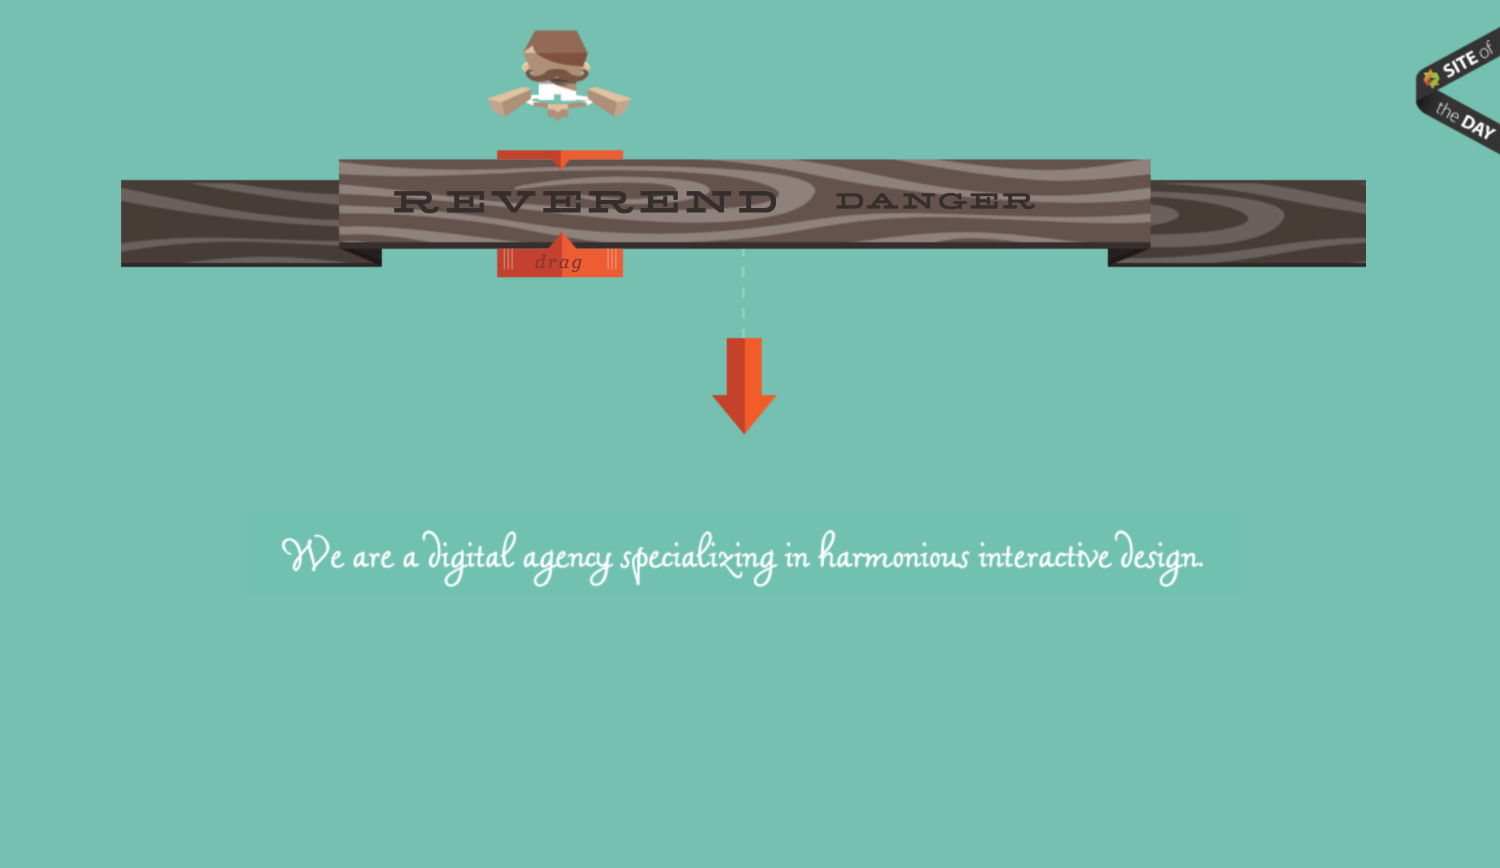
    Example 1: Reverend Danger

    This digital agency explains their creative process through a clever interactive design.

    reverand-danger-scroll-triggered-animations


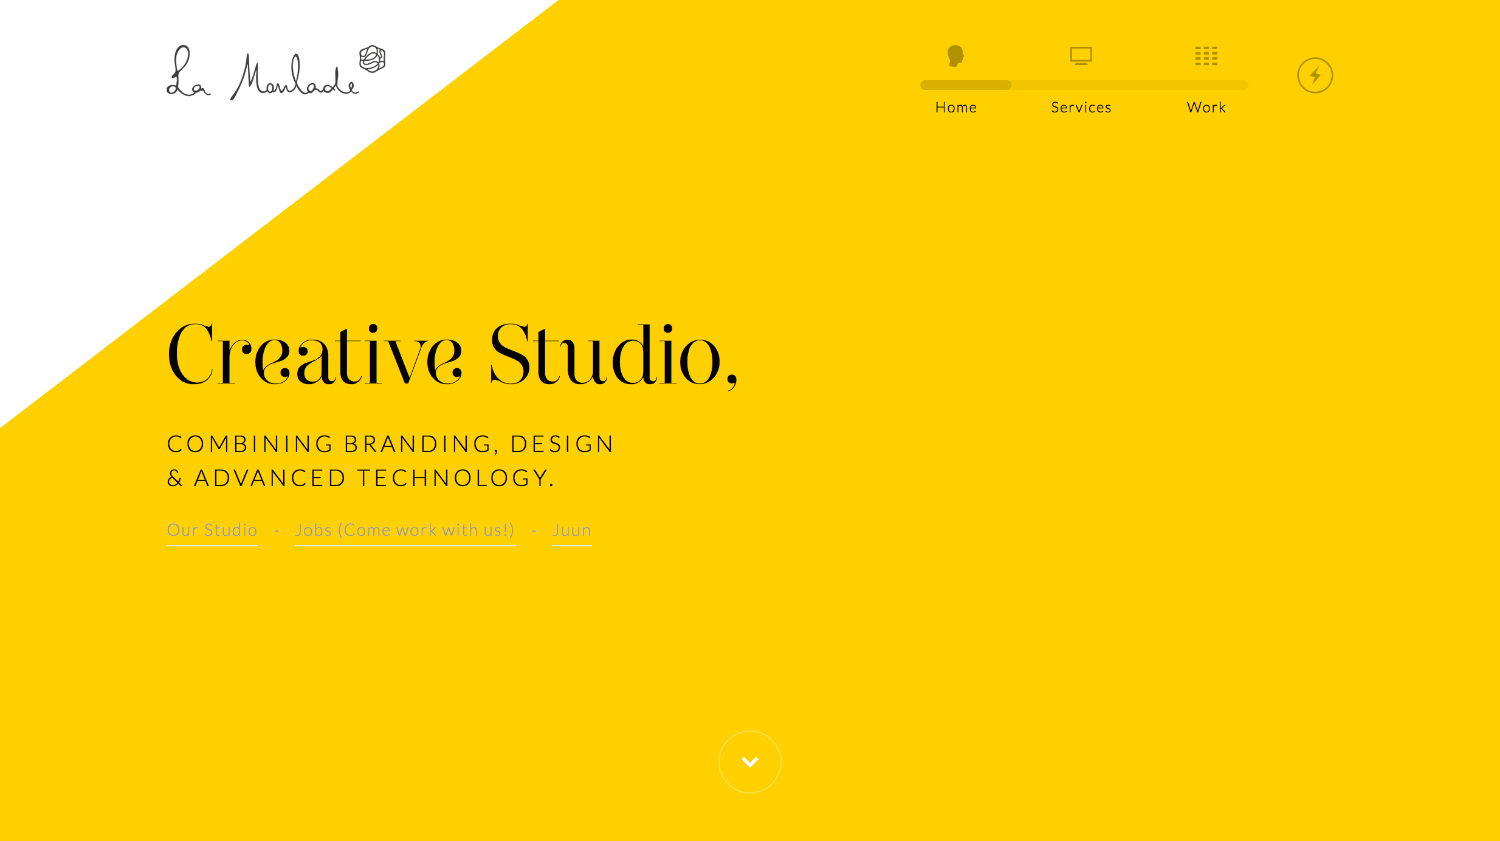
    Example 2: La Moulade

    I love the visual simplicity of this almost hypnotising website,

    La-moulade-scroll-triggered-animations


    3.     Parallax scrolling

    When the background images move slower (or remain static) than images in the foreground, creating the illusion of depth and immersion.

    Although the parallax scrolling is growing in popularity across the Internet, the main problem of this technique is that not responsive and mobile-friendly.

    Example 1: Case 3D

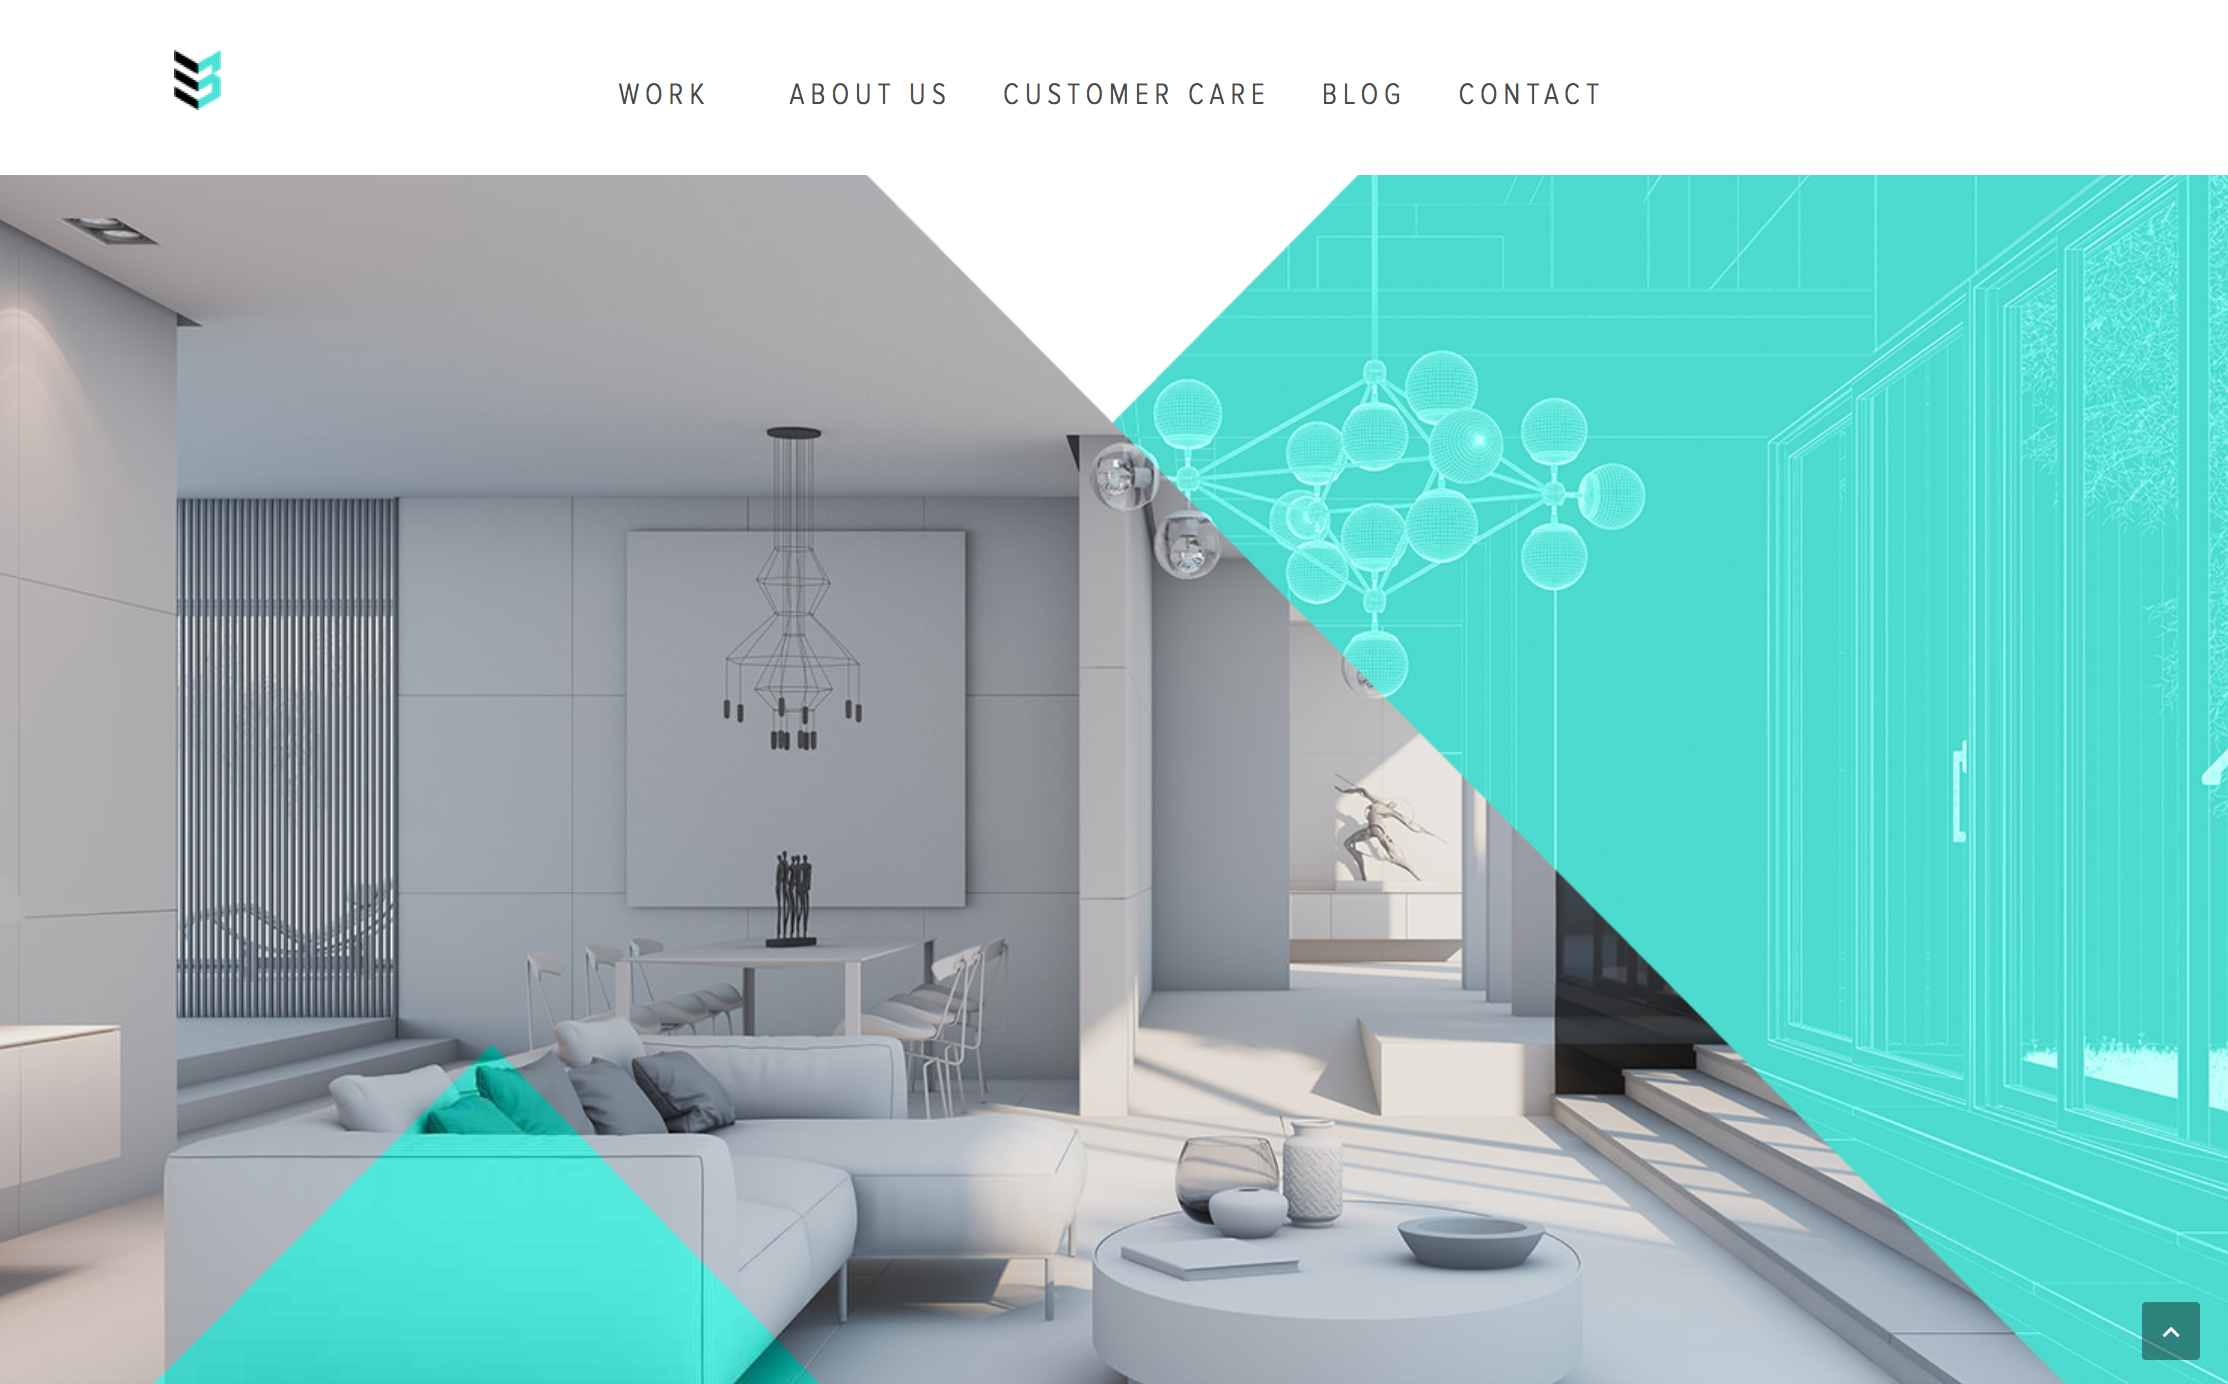
    In this website the parallax scrolling has a clear purpose: it shows the transformation from sketches to amazing 3D visualisations.

    Case-3D-parallax-website


    Example 2: Beoplay

    An excellent example of how sounds can also play an important role in storytelling websites. As you scroll down the sound gets louder as if it's slowly approaching to the visitor. The sound here is used to create a tridimensional illusion where elements can get closer or further in the distance. Open a new window browser on top of this website and see what happens...

    beoplay-parallax-website


    4.     Hover-to-reveal copy

    If the website contains a lot of copywriting, the visitor will find the site too overwhelming and abandon it quickly. Hover effects are a clever way to hide some of the content making the site easy to scan. When you mouse over an element, other pieces of information are revealed.

    This way to present the information is very interactive. The visitor explores the site searching for hidden content.
    Example: Evoenergy

    A great storytelling example with ecological message. Information is displayed as you hover over the different elements of the graphic, creating a very playful and engaging experience for the visitor.

    Evoenergy-hover-to-reveal-website


    Takeaway

    A good storytelling website is a powerful communication tool that when is done correctly can:

    • Explain complex concepts or ideas in a simple way, easy to understand by the audience
    • Create an emotional connection with the visitors
    • Make the content more engaging and visually appealing
    • Provoke curiosity and encourage people to navigate through the entire page.
    • Persuade the visitor to take action in a more effective way

    Do's and dont's before getting a new website

    So you want to design a new website for your business. You have images, content and are all ready to get started. You want your website up and running in a few weeks. However, after meeting with your designer you realise it’s not going to happen so quickly.

    Not just that, you also realise that some of the decisions you made on your own for your website weren’t quite right, which ends up wasting time and money.

    To get a website design project right from the beginning it is important to know what you should do and what you shouldn’t, or at least not without consulting your web designer first.

    Do focus on the main purpose of the site

    The main purpose of any business website is growing the business, but the question is HOW. Do you want to improve your brand awareness? Or grow your sales? Do you want to give your existing customers better service?

    By having a clear description of the main purpose of your website you will help your designer understand where the focus should be and make confident decisions along the design process.

    Do sign a design contract

    A design contract is the best way to ensure everyone understands and agrees with the terms of service. The contract should include basic terms and conditions on events such as contract termination, copyrights, licensing, payment conditions and service limitations.

    I use the design contract provided by AIGA (The Professional Association For Design).

    Do get an estimate in writing

    Although a website project is very difficult to quote in its early stages, always ask for an estimate before paying any deposit to avoid unpleasant surprises.

    Ensure you understand the billing method – hourly rate or fixed price –, what’s included in the price and what’s extra.

    In this other post, I explain how I price my design services to make it as fair as possible for both, the client and myself.

    Don’t buy hosting

    Discuss the hosting options with your designer first. Some solutions cannot be hosted by anyone, like SquareSpace. Also in many cases, web designers and developers work with multi-hosting services and could host your website for free.

    Do always choose open-source tools

    Always request an open-source content management system (CMS) – like WordPress, Magneto, Shopify or Squarespace - so that any designer or developer can access it in the future.

    Some design companies work with proprietary CMS. If that’s your case, you'll get stuck with the same company – and their fees - forever.

    Don’t rely on the design brief only

    One of the hardest things of a brief questionnaire is asking the appropriate questions in a way that the client can easily understand. For example, when a client says “I need a Wordpress website” quite often what they mean is “I need a Content Management System”, but Wordpress might not be the right solution for them.

    After receiving the client brief, I always arrange a face-to-face meeting with them – or a virtual meeting if the client is not local – to fill the blanks and clarify the project requirements.

    Do research your competition

    To figure out what your website needs in terms of content, functionalities, etc, check out your competitors websites and make a list of all the features that you would like to incorporate into your site. This list will be really helpful to your designer later.

    Do invest in beautiful photographs

    The Internet is getting more and more aesthetic every day. Professional photographs beautifully styled can immediately build trust in your business, and create a quick emotional connection with your visitors.

    Do not use photos taken by yourself in your website. A good image needs proper lighting, a good styling and quite often a lot of Photoshop editing and retouching too.

    You can see an example of Photoshop retouching for one of the website I designed last year here in my portfolio.

    Do involve your designer in the photography shooting

    Not every image is suitable for a website. Your website photographs must have a consistent look and feel, an appropriate lighting and a specific format. A lot of white space in the background is also highly desired to add text to it.

    Your designer can brief your photographer on what sort of images your website may need.

    Do get your copywriting ready

    Any website is designed around its content. To avoid delays during the design process, you can start working on your content beforehand, and have it ready in advance of the website design being started.

    At this stage, you may want to engage a copywriter to help you compose a compelling message for your website.

    Do carefully think about your page structure

    Provide a logical order to your website content to make it easy for visitors to navigate. Organise your content in pages and connect pages through relevant links and call-to-actions (CTA).

    Start by putting together a simple site map; fill every page with sections, and every section with subsections.

    For some tips on How To Write The Perfect CTA visit this other post previously published here in my blog.

    Don’t make the users think, wait or read

    Having too much content will make your visitors feel overwhelmed and want to leave your site quicker.

    Break your content into the smallest possible units to make it very easy to read. Add titles and subtitles and establish message hierarchies. Use icons, bullet points and numbered lists to make your content easy to scan.

    Do think of ways to engage your audience

    When someone visits your website she/he won’t be immediately ready to buy from you or hire your services. The conversion process is slow and takes time and a lot of interaction with the visitor to build trust before they are ready to make the purchase decision.

    These interactions can be done through sign-up forms, downloads, blog comments, social media following and sharing tools, etc. They are supported by external platforms and tools that need to be set-up beforehand and are usually introduce by effective CTAs.

    Discuss any possible interactive feature with your designer before getting the design process started.

    Don’t assume your website needs everything

    Not every website needs a blog, an email subscription box, or links to social media pages. Any of these features will involve a lot of time putting quality content together for your readers.

    Having an abandoned blog or social media page will give your visitors the impression of carelessness, and they will lose trust in your business.

    Don’t expect success overnight

    The single fact of having a website online doesn’t mean that you’ll start getting visitors straight away, neither will you get customers or clients inmediately. Your website is just the beginning of the journey.

    Be prepared to invest time and money in digital marketing to drive traffic to your website and increase the sale conversions.

    Don’t try to do it yourself

    I always believe in doing what I do best and leave everything else for those who are experts in everything else.

    Behind any website design process, there are many things to take into consideration to create an effective business website.

    Even if you feel confident building your own website, you may want to get some help and guidance from your designer through some mentoring sessions or design consultations.


    Wrap-up

    Good design takes time, and building a professional website can take a few months of work. If you are looking to build a professional website to grow your business, engage a website designer asap. Your designer will help you prepare the material, setting your website right front the beginning and ensuring you get the best return on investment for your business.


    How I Overcome Creative Blocks
    How-to-overcome-creative-blocks

    Every designer experiences a creative block from time to time. It doesn’t mean you are a bad designer because of it, even the most experienced designers’ face creative blocks sometimes.

    However, experienced designers know how to deal with creative blocks so that they cause the minimum delay in their projects. And they have learned this from having gone through a lot of creative blocks along their professional lives.

    If you work in a creative field, you will also have to face create blocks from time to time, and must find the best ways to overcome them. Not every way will work the same for everyone, so you must identify what works well for you and what doesn’t.

    Creativity is the ability to come up with new, unique and original solutions for existing problems. Creative thinking isn’t a natural gift, it’s something that can be taught and learned.

    Today I’m sharing my own tips to grasp ideas to resolve creative challenges faster and avoid creative blocks. I’m also sharing some tips on how I overcome these blocks when they happen.


    Causes of a creative block

    Your inability to come up with good ideas could be caused by an external factor. If that’s the case, address the root problem of what’s blocking and preventing you from concentrating and focusing on your work. Here are some common reasons of creative blocks:

    • Too many distractions
    • The project is too big for the designer
    • Physical (or mental) health issues
    • Personal difficulties
    • Unsuitable client/project (the designer is not a good fit)
    • Stress or tireless
    • Boredom

    Although quite often the cause of a creative block is an external issue that needs to be addressed, sometimes you simply run out of ideas.


    Avoiding creative blocks

    Knowledge is an important factor of creativity. The more you know about the problem the easier will be to find a solution. Being constantly consuming and retaining information is one of the best ways to avoid creative blocks. Here are some tips:

    1.    Have a journal

    Ideas come and go quickly. When they come try not to let them go. Find ways to store your ideas to be reused in future projects. This is how I do it:

    • I carry several journals in my bag: one for sketches, another for blog post ideas, other for resources, etc.
    • I also take photos of everything I find inspiring from my phone.
    • I have Pinterest boards for everything, and constantly pin images on them
    • I have hundred of lists in Trello to organise ideas in smaller groups.

    2.    Stay curious

    Having a list of learning resources will help you read, learn and be informed of the latest industry news and trends. This is what’s on my list:

    • books to read
    • industry magazines and e-courses I’m subscribed
    • blogs and podcasts I follow
    • event calendar of upcoming courses, seminars and webinars I want to attend.

    3.    Surround yourself with creative people

    Hanging out with other creative fellows and sharing ideas can be also a great way to learn and increase your industry knowledge. Here is how I do it:

    • Join meet-up groups
    • Attend networking event
    • Organise catch-up coffees with industry fellows

    4.    Travel and explore the world

    The more you travel, the more you experience and learn. Traveling and living abroad has been the most enriching life experience I’ve ever had. It took me out of my conform zone, made me forget about the traditional ways to do things and see the world from a new angle. All of this has significantly improved my ability to find uncommon solutions to given problems.


    Overcoming creative blocks

    Having a creative block is stressful and produces anxiety caused by the fear of failure. It’s a difficult situation that needs to be overcomed as quickly as possible. When I find myself in one of these creative blocks, this is what I do:

    1.    Deconstruct the problem

    When the problem is too big or too complex, divide the problem into smaller units and address one by one. For example, when designing a website I start with the simplest things: planning the sitemap, then the wireframes (layout), after that I design icons, boxes and other graphic elements and finally I design individual pages.

    2.    Take breaks

    Sometimes walking away from the computer for a while help you relax, rest and come back to the problem in a better state of mind. Working many hours with no rest will only get you overtired, impacting in your ability to focus and think straight. To avoid this situation I work on blocks of 2 or 3 hours and take an hour rest at least between blocks.

    3.    Exercise

    I never enjoyed exercise until I realised how much it stimulates my creativity. Going for a long walk in the evenings, a run on the beach early in the morning or 45 mins yoga class, can help your creative juices flow and bring ideas faster.

    This other article on “The cognitive, emotional and neural correlates of creativity” by The University of Amsterdam, Netherlands shows how body movement helps overcome mental blocks and lack of inspiration.

    4.    Have a nap

    One of the best things about my Spanish heritage is the siesta. During my days as university student, I found out that waking up early in the morning and having a nap in the middle of the day helped me keep my focus on my studies for longer and retain information faster.

    When I get stuck on a problem, a nap helps the brain to rest and reset so that I can have a fresh start after.

    This other study by University of California, Berkeley, demonstrates that human memory develops during sleep time periods, which helps your mind access ideas hidden in the subconscious.

    5.    Bring the client into the creative process

    As a freelance designer, I don’t always have the input of a team to help me come up with ideas, but I can have my clients’ help. They’re usually happy to participate in the creative process, have plenty of information and knowledge on the problem that I’m trying to resolve, and together we can come up with amazing ideas after a brainstorming session.


    Your turn

    When you get stuck in a creative block, what do you do to get out of it? How do you reset yourself and overcome the creative block? How do you keep your creative juices flowing?


    How To Find Your Ideal Niche
    how-to-find-your-ideal-niche

    'What’s a niche?' and 'how can I find mine?' is a common question asked by many new entrepreneurs. Everyone knows finding a niche is key for any business to succeed, especially small businesses, but many struggle finding theirs.

    There is common a tendency in both life and business to try to please everyone. But we know not everyone will like us the same. Some people will love us, some other won’t. There’s no difference in business, we cannot be the perfect fit for anyone in the market.

    For example…

    A freelance web designer may not be a good fit to develop a complex website for a medium/large corporation. That website may require a team of professionals specialised in different areas of web design and development. On the other hand, hiring an agency to create a simple website could blow up a small business budget.

    Targeting smaller groups will allow you to easily connect with them, understand their aspirations and needs, as well as come up with better solutions to their problems. Also, in smaller markets, the competition is typically lower.

    A niche is an opportunity to find a solution for particular problem or satisfying the needs of a specific group of people, which is typically called target market.  This solution can be:

    • A product
    • A service
    • A platform or website

    In this post today, I’ll take you through the process of finding your ideal niche with real examples from my own business.


    advantages of being niche

    Many business owners feel that by establishing a niche will reduce opportunities and narrow their sales. However, it’s the complete opposite. Finding a niche means your business will have better chances to success because:

    1. you get a deeper understanding of your clients’ needs and can offer a more refined service
    2. you can simplify your business model and streamline your process and marketing efforts
    3. your message gets clearer and easier to understand
    4. your competition is lower which makes easier to get noticed and stand out
    5. your specialised solution can gain customer's loyalty quicker and you come easily to mind for referrals
    6. your fee/price can be increased, as specialised services or products can usually command higher fees than generalists.


    How to find your ideal niche?

    Step 1 | Finding your specialty

    When you are a small business, you cannot be an expert in everything. There are always things that you can do better than others. That’s your specialty.

    A specialty is a combination of things you love doing - your passions - , are really good at - your abilities - and have done many times before - your experience -.

    Being an expert on something also implies knowing something in depth. For example:

    • A technique – when you are an expert on a particular area, subject or tool. For example, as graphic designer you can be an expert in 3D design.
    • An industry – when many of your clients belong to the same industry you can claim an industry expertise. This is a common approach in bloggers.
    • A geographic location –many people prefer buying from locals or hiring local professionals. So proximity and local knowledge can also give you a competitive advantage.
    • A group of people – you can be specialised in an age-bracket (massage for babies), in a gender (men underwear), etc.
    • A style – when your aesthetic is different and unique to everyone else’s. This specialty works quite well for creative businesses.

    As I explained in this other post on Lessons Learnt From My First Year In Business, one of the mistakes made when I first started my business was to offer as many services as I could.

    On my second year, I niched down my services to focus on graphic and digital design, and took the other marketing services out of my offer. I also was lucky enough to have a variety of creative businesses among my clients, so I could claim my specialisation in this industry too.

    A good example…

    One of my lovely clients, interior visualisation company Living 3D, combined the owners’ passion for interior design with their experience in kitchen design and fantastic SketchUp skills to start a business specialised in 3D visualisations for kitchen and bathroom companies.

    TAKE ACTION: To find your own specialty ask yourself the following questions:
    • What are you passionate about?
    • What are you skilled at?
    • What are your knowledgeable on?
    • What are you more experienced on?


    Step 2 | Finding your ideal costumer or client

    Knowing what you can do and love doing for others will lead you to the next question: who are those “others”? They are those who need and value your product or service, and are willing to pay for it.

    For example…
     
    Who may need my graphic and web design services? New businesses and start-ups will always need a new brand and website. Also, young company with a few years of market success they often need to take their businesses to a next level having a more professional brand and website.

    TAKE ACTION: to find your ideal client ask yourself the following questions:
    • Who's in need of my products/services?
    • Will they value what I can do for them?
    • Will they be willing to pay for my time/product?

    This other post by Lauren Hooker of Elle&Co describes7 Tactics to Help You Get to Know Your Ideal Customer.


    Step 3 | Identifying problems or needs

    The more connected and knowledgeable you are about your target market the better you will understand their challenges and specific needs.

    For example…

    After launching a new brand and website, my clients usually want to start a marketing plan to promote their businesses. They need search engine optimisation, media exposure… but they rarely have the budget to hire SEO specialists, social media experts, public relation agencies, etc.  So, I identified the need to develop a marketing strategy on a small budget.

    TAKE ACTION: to identify opportunities ask your market the following questions:
    • What would they like to achieve through their business?
    • What's stopping them from achiving it?
    • What would they like to have in order to achieve what they want?

    I found client conversations, Google searches, blog comments and forum questions the best ways to understand my target market struggles. Surveys can also be an excellent way to get this information from your market, although conducting a survey requires specialised software and professional knowledge on market research techniques.


    Step 4 | Researching competitors

    Now you can find out who is already providing solutions to those needs and how. Ideally nobody else would be already offering a solution, but if they are, then try to find a way to resolve the same problem in a different and better way than the others.

    For example…

    Back to my target market, in the Internet you can find many marketing books, guides, blogs, marketing plan templates… But I could barely find anything specialised in the creative industry. I couldn’t find any marketing workbook/planner either, so I found here a possible niche.

    TAKE ACTION: to research your competition ask yourself the following questions:
    • Who is already serving the same market needs? (your competitors)
    • How are they doing it? (their solutions)
    • What hasn’t been done yet? (your possible niche)

     
    Step 5 | Designing specialised solutions

    Working with a small group of people will allow you to quickly identify specific needs and easily study how others are already serving those needs. So you can come up with a solution to satisfy the same needs in a different –or just simply better - way to your competitors.

    For example…

    I developed a solution to help creative businesses to identify marketing priorities and plan their promotional activities by themselves, on a small budget and with no marketing knowledge. Although there were some marketing books on the same topic, I presented my solution in a format that others didn’t: a printable marketing planner/workbook (you can find this product at my shop)

    This digital format makes my product conveniently available everywhere 24/7. The workbook format makes it very actionable and easy to use.

    TAKE ACTION: when designing your solution ask yourself the following questions:
    • Is my solution unique and different to everyone else?
    • If my solution is similar to others, how do I differentiate myself?
    • What are the benefits of using my solution vs using the competitor’s solutions?


    Step 6 | Evaluating profitability

    You may come up with a great solution for a market, with very low o none competitions, but unfortunately you make no money with it. Before spending your time, money and energy in launching a product or a service ensure that:

    •  Your target market is not too small,
    •  People in your market understand your product and find it easily,
    •  They can and want to spend the money you’re asking for it,
    •  The product has good profit margins.

    For example…

    For many months I researched the possibility to produce printed copies of my marketing planner, but it wouldn’t have a global research, and the local market was too small to make my planner profitable. I also tried many different ways to sell this product online, until I found Etsy the most effective.

    TAKE ACTION: before developing your product or service ask yourself the following questions
    • How can I reach my target market?
    • Who is influencing my target market?
    • How much should I sell my product for to make a profit?
    • How much the competitors ask for their solutions?
    • Does my solution have better value for money than the others?
    • Ideally, how many monthly sales should I make for my product to be profitable?

    Wrap up

    A niche is a combination of passions, skills, knowledge, experience and ability to make money with all of this. If you’re very passionate about something but there is no one willing to pay for it there is no market out there for your passion. If you just follow the money, not a passion, you will be easy to beat by your competitors.

    To know more about finding your niche also read: